If you're like us, the close of the Canadian summer can bring with it a mixed bag of emotions. On the one hand, autumn cycling - with the changing colours and falling leaves - is arguably the loveliest (and most picturesque) season of the year to be on a bike. The temperatures, at least at the start of the season, can be beyond comfortable and possibly even enhance your performance as you escape the hot, humid, sweaty days of summer for cool breezes and a crisp atmosphere. On the other hand, we can't resist thinking ahead to the stark days of winter with snow on the ground, slippery roads, and bone-chilling winds (yikes!).
Needless to say, you could always move your training indoors when the weather takes a nasty turn, but if you just aren't ready to give up on 'the cycling season' or to trade in rubber-on-road (or trail) for the tedium of pain cave sweat sessions, then read on to learn how to equip yourself to stay warm (almost) year-round and embrace all the variety that changing seasons can usher into your rides even here in Canada. Winter cycling doesn't have to be miserable and with the right gear it can really break up those trainer sessions.
Layering up for Fall and Winter Cycling
Summer cycling is easy, right? Throw on a pair of bibs, a jersey, socks, and shoes and you're out the door. But, as temperatures start to drop, you will be compelled to dedicate a wee bit more of your routine to gearing up accordingly. Luckily, with practice, fall and winter cycling can become just as easy as summer cycling.
You have probably heard - going back to your childhood - that you should dress in layers to stay warm. Well, we're here to tell you this is as true in cycling as it is in tobogganing, but perhaps for different reasons. Conventional wisdom suggests that air trapped between the layers of clothing will keep you warmer, but - in cycling - we have to consider our working bodies beneath the layers: The perspiration that is created, the need for the skin to breathe, and - naturally - protection from the winds created by your forward motion. So, needless to say, shopping for winter cycling gear is a bit more complex.
We advocate the 'sandwich' approach to dressing for fall and winter cycling. The 'bread' is a solid base layer and outer shell while the 'peanut butter and jelly' is a combination of various mid-layer options depending on just how cold it is and how hard you will be riding. Not only does this allow for more warmth and breathability, but also allows for adding and removing layers as the temperature fluctuates throughout a ride.
Cycling Base Layer:
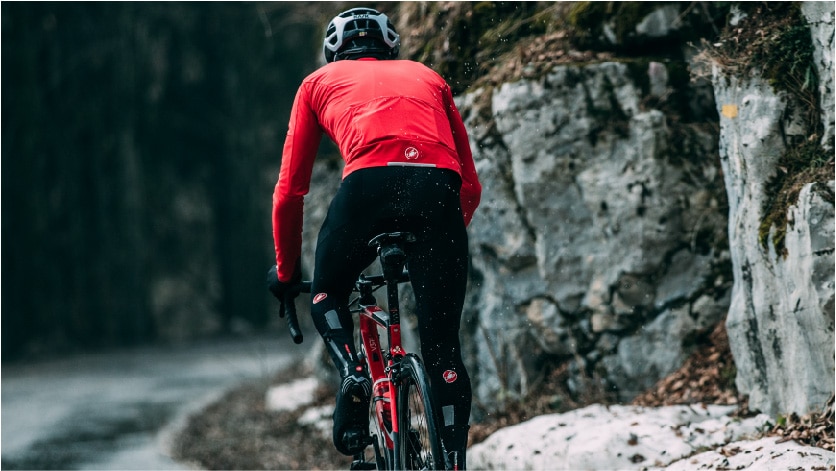
To base layer or not to base layer in the summer? This debate could very well rage on forever, but no one will disagree that, once temperatures drop, a cycling base layer (for men and women) is a critical feature of any cyclist's winter cycling gear to keep them warm and comfortable on the bike. Today, base layers are available in a wide range of options and technical fabrics to wick moisture, speed drying, and promote a warm core. Here are some things to consider:
- To be effective in removing moisture, your cycling base layer should rest against the skin, which means it should be well-fitted or skin tight.
- Given the base layer is the direct contact point with your skin, you will want to ensure that whatever fabric you opt for agrees with you (try to avoid any fabrics that will feel itchy or uncomfortable against your skin).
- There are a wide variety of fabrics to choose from and all offer slightly different trade-offs:
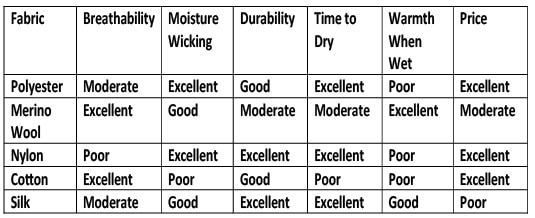
- A heavier fabric, such as Merino wool, can feel quite warm, pleasant, and inviting when you first slip it on, and it's a popular choice for a high-quality base layer as it maintains warmth even when wet. The downside is that Merino wool has the potential to feel a wee bit heavy once it becomes saturated with perspiration, and it doesn't dry as fast as polyester or silk. We typically prefer Merino as a second layer, but we'll come back to that.
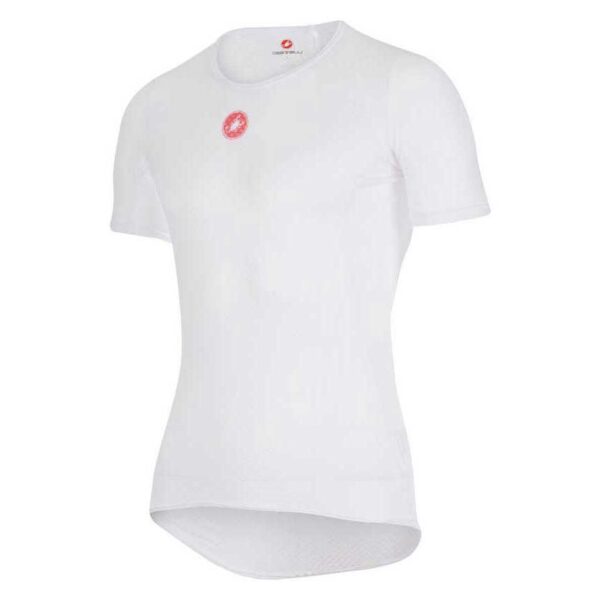
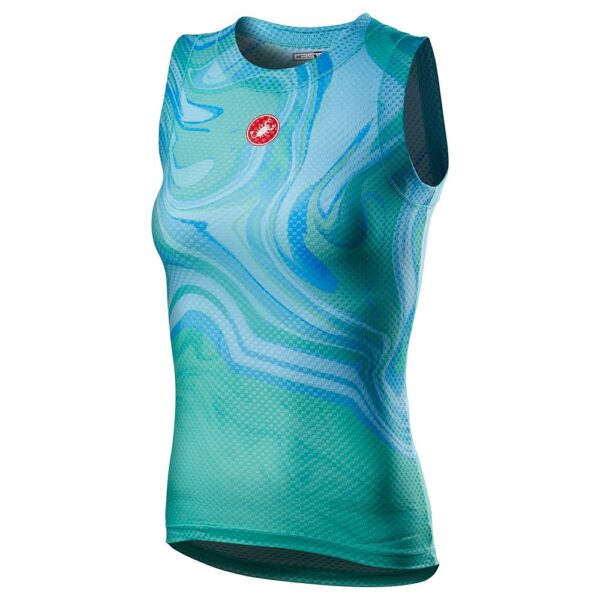
- When choosing a base layer, we recommend prioritizing moisture wicking and fast drying time, such as polyester or polyester blends, which offer an excellent mix of breathability and durability. For example, the men's CASTELLI Pro Issue SS Base Layer features 100% polyester 3D mesh fabric that creates dead air space next to your skin while the polyester capillary action moves sweat away to keep you dryer in cool conditions. Likewise, the women's CASTELLI Pro Mesh W Base Layer features 3D mesh fabric for excellent moisture management.
- When we think of base layers, we typically think of the trunk, but layering can be equally beneficial to your extremities as well.
Cycling Outer Shell:
Similar to base layers, an outer shell (for men and women) is critical to staying warm on the bike as temperatures begin to dip. The principle is simple: Prevent the elements from fully penetrating your other layers. The challenge is achieving this in such a way that your skin can still breathe and moisture from underneath can find a path to the surface and out. The right shell and base layer combination can carry you a surprisingly long way into cooling autumn temperatures even without thicker mid-layer insulation. Fortunately, technology has come a long way in the last few years. Here are some considerations:
- The primary priority with your outer shell is to prevent wind from ripping through the front of your clothing and cooling the trapped air and moisture wicking layers below.
- Importantly, through the use of polyester or nylon material with a tighter weave, almost any shell will limit breathability, which is why they aren't always worn in other outdoor pursuits unless it is windy or rainy. Of course, in cycling, we create our own wind and, thus, you should seek a 'soft shell' garment that provides wind (but not necessarily waterproof) protection on the leading edges.
- Most modern cycling shells will provide fabric with increased protective properties on the front and more breathable material on the rear to allow your other layers to exhaust.
- 'Hard shells' combine many of the same properties as soft shells, but incorporate a coating or laminating treatment to make them waterproof. And, as with anything, there are hybrid products that provide a water repellent treatment to otherwise softshell garments.
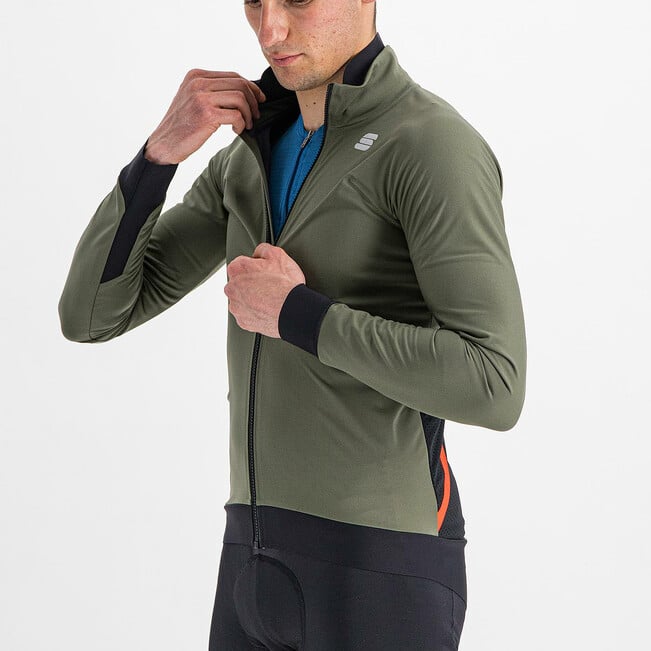
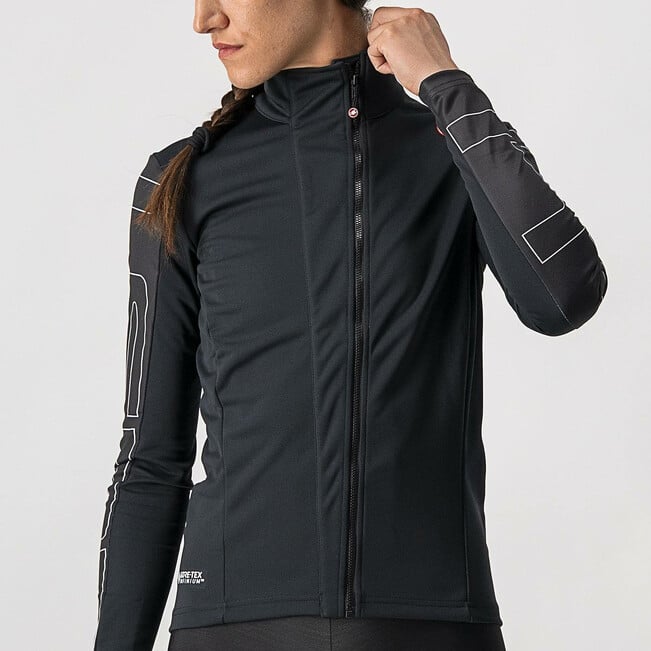
- There are a variety of cycling outer shells on the market at widely varying price points. When it comes to your upper body, you will likely need a couple of different options for varying temperatures – a windproof vest/gilet (such as the men's SPORTFUL Pro Vest or the women's SPORTFUL Giara Layer W Vest) and a heavier winter-oriented long-sleeve jacket (such as the men's SPORTFUL Fiandre Pro Cycling Jacket or the women's CASTELLI Transition W Jacket). The jacket, however, doesn't need to - and shouldn't - be a parka considering the layers underneath will provide the majority of the warmth.
- If you are prone to saddling up in wet conditions, a hard shell rain cape is wise, too, especially if you are bike-packing and opportunities to dry out are limited.
Cycling Mid Layer:
Now that we have covered the layer next to the skin and the layer exposed to the elements, finishing our 'sandwich' is a wee bit easier. In a nutshell, it means packing on enough layers for the ambient temperature and for the intensity of your ride.
- Giving consideration to the moisture wicking and breathability of the layers is still critical as it can be helpful to position additional wicking fabrics close to your base layer in an effort to draw the moisture further away from your body to be exhausted.
- Learning the ideal number of layers ultimately comes down to experience for your particular hot/cold preferences, but here's a tip: You should be a little bit cold when you start your ride, or you're probably going to be too hot once you've finished your warm up.
- There's a strong chance you already have some suitable mid layers in your arsenal: Long-sleeve jerseys (such as the men's CASTELLI Puro 3 Jersey FZ or the women's SPORTFUL Supergiara W Thermal Jersey), short-sleeve jerseys (such as the men's POC Essential Road Logo Jersey or the women's CASTELLI Anima 3 Jersey), thermal base layers that are worn on top of a lighter base layer, and even more casual fitted clothing. Remember that, with a quality base and shell already fitted, you probably need less than you think once you're up to speed.
Fall and Winter Cycling Clothes from Head to Toe
Head:
It turns out that the old adage that 80% of heat is lost through our heads is a bit of a myth. The reason we tend to lose more heat from up top is because it's typically an area we leave exposed. Nevertheless, if you've done any riding in wintery conditions, you know that your ears, head, and face can become painfully cold (in that order) if left unprotected from the elements.
Head – Base/Mid Layer:
- Fortunately, if you are lucky enough to be blessed with a full head of hair, your base layer is built in!
- For those of us with challenged follicles, a simple summer skull cap or bandana (such as the CASTELLI Pro Thermal Head Thingy) can serve as an adequate base down to about 8-10°C.
- As the weather dips below 8°C, we recommend covering your ears first with a headband (such as the CASTELLI Pro Thermal Headband) or light thermal cap and building up to thicker caps that fully cover your ears.
- Below -5°C, consider a balaclava to provide some facial protection layered underneath a thermal cap.
Head – Outer Shell:
- Your helmet – which we hope you are wearing year-round – acts as an outer shell and provides some protection from the cold.
- Unfortunately, most modern helmets have been designed for maximum airflow to keep you cool in the summer. The simplest solution? Tape up those vents or get a helmet cover to block the wind and save a few bucks for other winter cycling gear.
- That aero road helmet (such as the ABUS GameChanger Helmet) you bought to outsprint your group ride buddies to the town limit sign could come in handy here as they typically have less air flowing through the helmet, which also makes them ideal for winter cycling.
- One final piece of winter cycling advice – no matter how cold it is, don't forgo a helmet in favour of even thicker hats – they won't provide crash protection.
Neck:
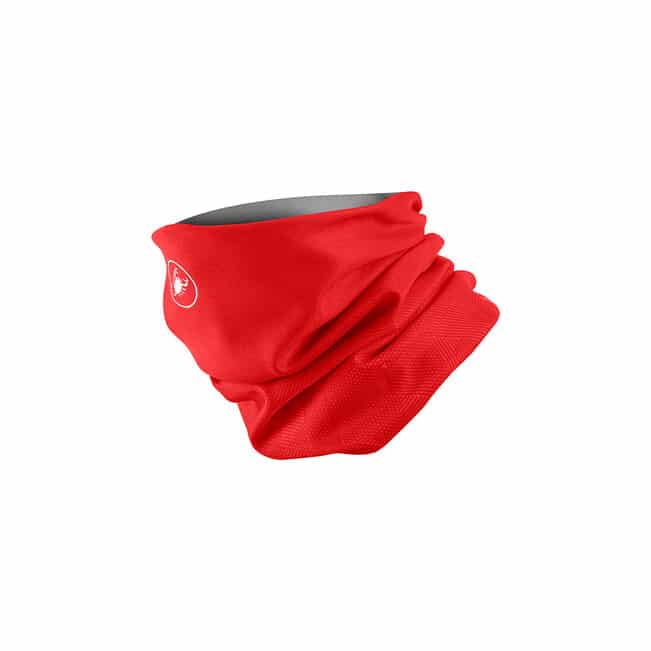
A cyclist's neck is so often forgotten - right up until that first gust of wind flows down into your perfectly layered core. Long flowing scarves are far from aerodynamic, but there are a host of products that aim to protect your neck and limit wayward winds from cooling your core, such as the CASTELLI Pro Thermal Head Thingy.
You don't need to go overboard here. Typically, one layer (as the temperature drops below 5-7°C) will suffice. Plus, products, such as the CASTELLI Pro Thermal Head Thingy, or a good old-fashioned balaclava pulled up over your mouth can help to prevent that pesky 'runners cough' after a cold weather jaunt. Last but not least, a final benefit as we continue to navigate the COVID-19 pandemic, these could serve in place of a forgotten mask for your mid-ride pit stop.
Upper Body:
Maintaining the right amount of warmth in your upper core – from trunk to waist to neck – is where we can fully employ the layering techniques described earlier. Most of your perspiration comes from this area and overdressing just leads to different problems than underdressing. As we shared earlier, the main purpose is to wick moisture away from the skin. We don’t want to rehash the points above, so we'll dive into recommendations on how to get suited up for your next fall or winter cycling adventure.
Upper Body – Base layer:
- 10-16°C: We're advocates of wearing a lightweight cycling base layer (such as the men's CASTELLI Pro Issue Sleeveless Base Layer or the women's CASTELLI Pro Issue 2 W Sleeveless) most of the year in all but the hottest conditions of mid-summer. A short-sleeve, or even sleeveless, layer is perfect for providing a wee bit extra core warmth on cool mornings and won't cause you to overheat as the day warms up. Arm warmers (such as the SPORTFUL Fiandre Arm Warmers, the SPORTFUL Thermodrytex Arm Warmers, or the CASTELLI Thermoflex 2 Arm Warmer) are also on tap, but as a single base/shell layer.
- 0-10°C: As the temperature drops below 10°C, opt for a lightweight, long-sleeve, synthetic fabric base layer next to the skin if you have it. If not, we find that a short-sleeve base layer (such as the SPORTFUL Thermodynamic Lite T-Shirt) – yes, that same one you wear in the summer – has a very wide operating window, down to 2-5°C if you incorporate arm warmers purely as part of the base.
- -15-0°C: As temperatures near, and dip, below the freezing mark, long-sleeve thermal base layers find their groove provided they are well-fitted and hug the skin. Otherwise, we recommend sporting them as a mid-layer on top of a lighter base layer.
Upper Body – Outer Shell/Mid Layer:
- Building an inventory of outer shells is typically more costly than acquiring base layers and mid layers, therefore, we suggest determining what shell you will wear and then back into your mid layers based on the conditions.
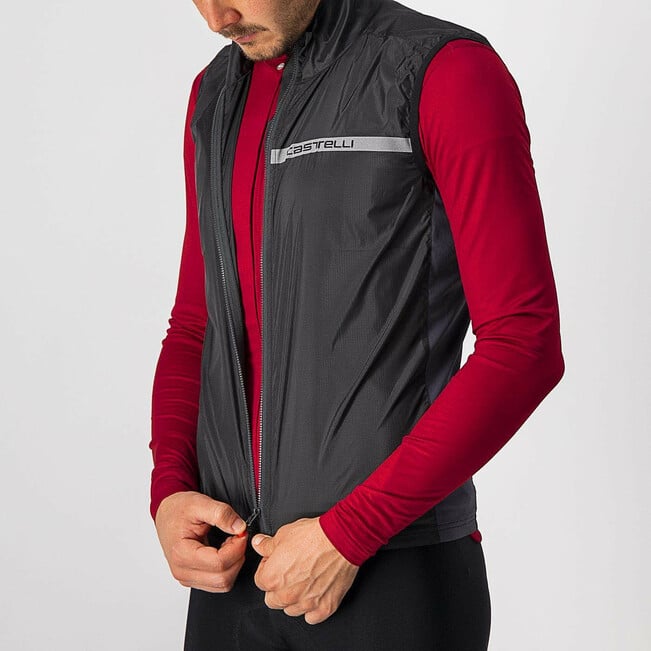
- 8-16°C: This is the sweet spot of the simple wind blocking vest (such as the men's SPORTFUL Hot Pack Easylight Vest or the CASTELLI Squadra Stretch Vest, or the women's SPORTFUL Hot Pack Easylight W Vest or the CASTELLI Aria W Vest), which will protect your core and allow you to get your warmth from a combination of short or long-sleeve jerseys (for men and women) and arm warmers (depending on short or long-sleeve base layers for men and women) that most cyclists already have buried in their closet.
- 4-8°C: If this is the morning start temperature with warming expected, opt for a lightweight long-sleeve shell on top of the wind blocking vest (for men and women) and arm warmer combination described above. Doing so will allow you to protect your arms when it's cold and easily transition to the 8-16°C kit by shedding the jacket and stuffing it in your pocket. On the other hand, if you expect to stay at 4-8°C for your full ride, choose the long-sleeve shell jacket (for men and women) on top of a mid-weight long-sleeve jersey (for men and women) and corresponding base layer (for men and women).
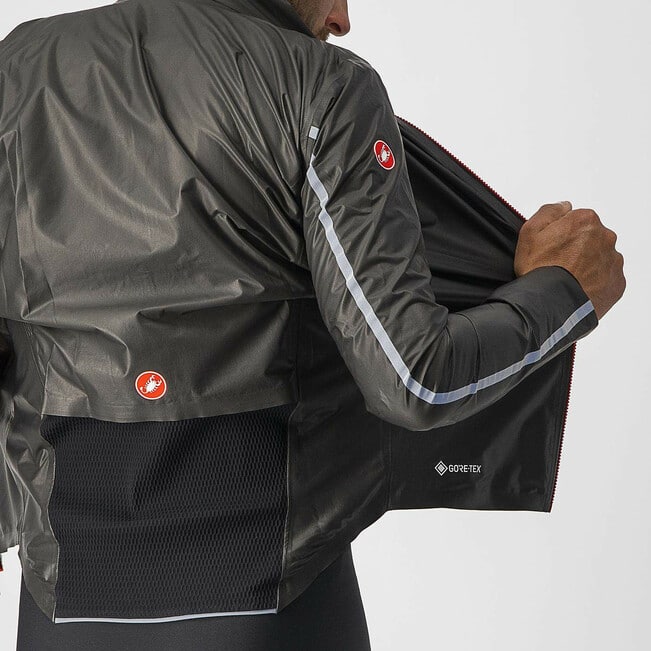
- -5-4°C: Here, you can break out your mid-weight 'winter' cycling jacket (at NOMAD, we stock a range of options for men as well as the CASTELLI Transition W Jacket for women), but - remember - a winter cycling jacket doesn't need to be extremely heavy as you will achieve your warmth by layering underneath it. At the upper end of the range, with temperatures still above freezing, the jacket may be enough with a simple short or long-sleeve jersey on top of a moisture-wicking base. Below freezing is where you will need to experiment with additional layers – light base layer (optional), thermal base layer, short-sleeve jersey, and various thickness long-sleeve jerseys.
- <-5°C: If you have a heavier winter cycling jacket, this is the time to wear it. Otherwise, maintain the layering habits described above – warm moisture wicking base, protective outer layer, and as many mid-layers as necessary. Resist the temptation to overdo it and over-bundle, as overheating will lead to too much sweat underneath and it will eventually make you cold if you take a break or you start to fatigue.
Lower Body:
The lower body is generally easier to get right than the upper body. But, beware! It holds special importance given the need to be comfortable in the saddle and ensure enough mobility in the legs to maintain performance. While the legs don't feel as cold as the other body parts, it is critical to protect your knees from the cold to prevent injury. Recommendations for temperatures below which knees should be covered vary from 15-18°C. Perhaps we're just a bit too Canadian, but we find the lower end of the range is suitable and wouldn't dream of wearing knee warmers at 18°C!
Finding a set-up that doesn't sacrifice comfort on the bike or cause saddle sores is critical, too. If you don't plan on riding extensively in cold temperatures, seeking out inexpensive bibtights could be appropriate. But, remember, it comes at a trade-off with chamois quality. If you have issues with saddle sores, or any chronic discomfort, you might want to opt for a higher quality pair of bibtights, or consider tights on top of your favourite summer bibshorts for men and women (but, beware that too much thickness between your shorts and your saddle can create other challenges).
High quality winter cycling pants often provide multiple layers of material to protect the knees and can be a one-stop shop for the layering we have described throughout this post, but - in especially cold temperatures - there is nothing wrong with slipping a pair of knee or legwarmers underneath your favourite tights.
- 12-16°C: Regular bibshorts with knee warmers (such as the CASTELLI Nano 3G Flex Knee Warmer, the SPORTFUL Thermodrytex Knee Warmers, or the SPORTFUL Fiandre Knee Warmers) should suffice, but - if you tend to get cold or are riding at a leisurely pace - you can consider upgrading to thermal bibshorts or leg warmers (such as the CASTELLI Nano Flex 3G Legwarmer) to extend the coverage over your full leg.
- 7-12°C: We find this to be the sweet spot for a pair of knickers (mid-length tights that cover the knee). Most knickers are of a mid-weight as they are designed to be worn in the spring and fall.
- 0-7°C: Full-length winter cycling bibtights (such as the men's CASTELLI Nanoflex Pro 2 Bibtight, the SPORTFUL SuperGiara Bibtight, or the SPORTFUL Classic Bibtight, or the women's SPORTFUL Classic W Bibtight) are in order as temperatures begin to approach the freezing mark, but seek out a pair that is breathable as it is still surprisingly easy to overheat if you are working hard.
- <0°C: Full-length winter cycling bibtights with significant wind and water protection. We haven't focused this post on riding in the wet (as it comes with additional considerations to stay warm), but winter riding often means wet and sloppy roads. Road salt and snow banks often result in a wee bit of spray.
Hands and Feet:
We have all experienced it: The misery of painfully cold fingers and toes. Cycling is especially prone to freezing your digits due to the extreme temperatures created by wind-chill and the blood flowing to the working muscles rather than all the way out to your extremities. Cold fingers and toes are the most cited reason for people not making a concerted effort to ride outdoors through our notorious Canadian winters.
Here's the good news: One of the keys to maintaining warmth in the extremities is to keep your core warm. So, if you follow the advice we shared earlier in this guide, you're already halfway there to keeping your toes toasty. You may notice that your fingers and toes start out cold (regardless of glove choice and shoe choice) for the first 30 minutes until your core warms up - and then you forget all about them. That said, to fully vanquish the cold and enjoy cycling through the winter months, you will need to add a few additional products to your winter cycling kit:
Hands:
- The most common mistake cyclists typically make with cold weather, or winter cycling, gloves is to seek out the thickest pair. Your hands are no different than the rest of your body and you should be thinking about layers if you want to keep your rides fun at subzero temperatures. If you choose carefully, you can get three pairs of gloves for the price of two, by selecting lightweight and midweight gloves that can be worn together.
- 8-16°C: A simple pair of full finger gloves with a bit of wind protection is enough to keep your hands warm down to 7-8°C. The goal is to take the chill off without restricting movement. Seek a pair that isn't too bulky as these gloves could form a base layer under a heavier pair of gloves as temperatures dip.
- 0-8°C: Midweight full finger gloves (such as the CASTELLI Spettacolo Ros Glove) will keep you warm close to freezing, but pack your lightweight gloves in your pocket so you can add a base layer underneath if you can't get warmth into your fingers.
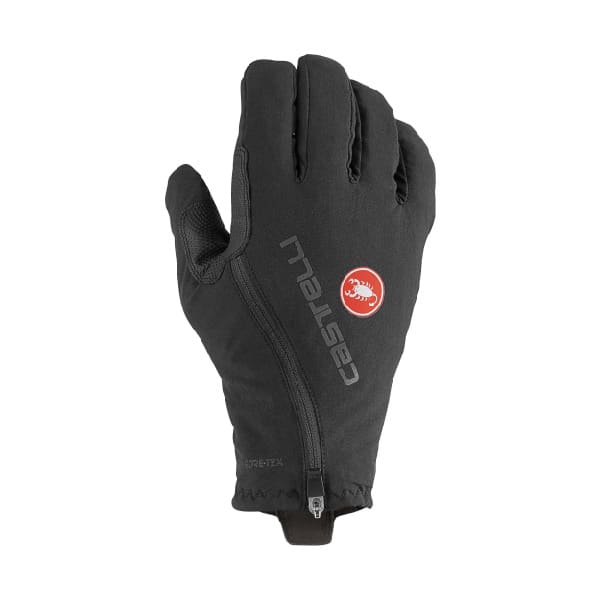
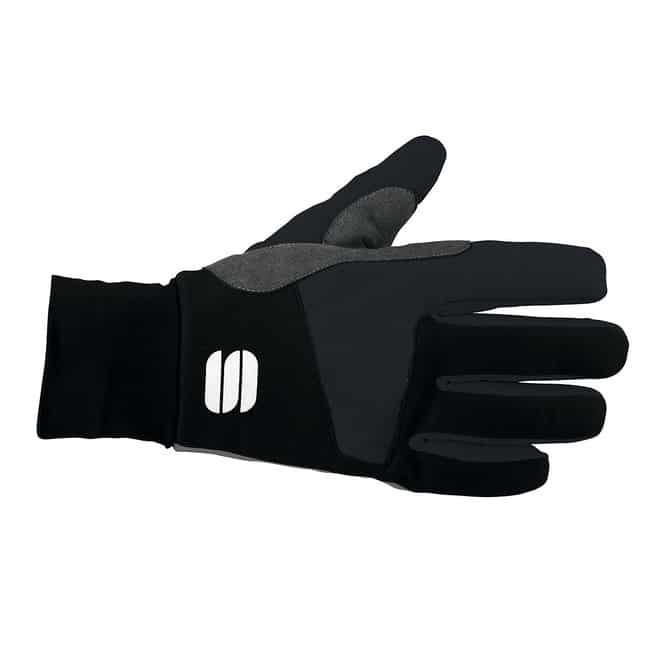
- -5-0°C: We really don't enjoy wearing mitts or lobster claws so layer up those light and mid-weight gloves to squeeze out another 5 degrees. Extreme cold gloves are also an option and can be quite effective, especially with a lightweight base layer underneath. Check out the SPORTFUL Subzero Gloves, which are SPORTFUL's warmest nordic ski glove, or CASTELLI's Espresso GT Glove, which provide extreme warmth for cold rides with PrimaLoft® Gold insulation.
- <-5°C: Mittens and lobster claws (such as the SPORTFUL Subzero Mittens) will be the most effective as your fingers generate more heat when they aren't separated. We recommend experimenting with different layering options as it's admittedly difficult to keep your finger tips warm as cold turns to frigid.
Feet:
- Whether you've been thinking about it or not, you're likely already layering your feet. Your socks work as a base layer and your shoes as a shell, which is typically enough to keep you warm down to temperatures as low as 10°C. However, staying warm through the winter (especially a winter in Canada!) involves adding a wind resistant or thermal shell via a shoe cover and bulking up with layered or thicker socks.
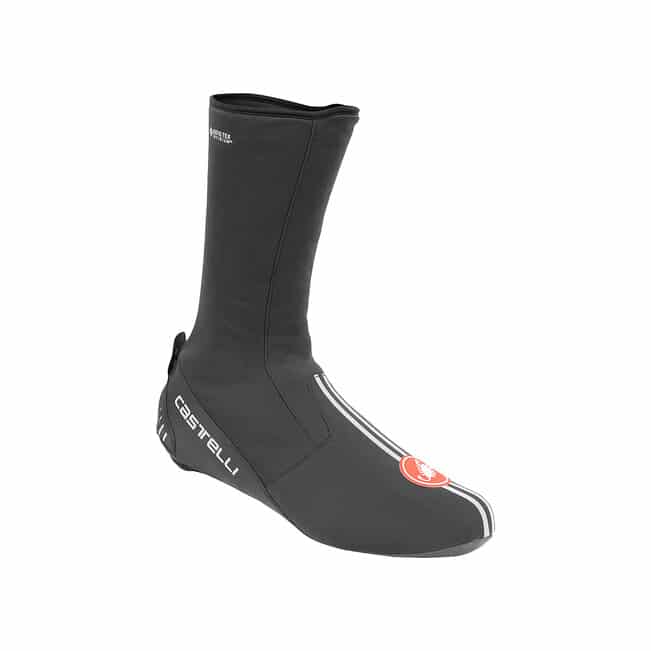
- 5-10°C: Start with a simple wind/rain blocking shoe cover (such as the CASTELLI Estremo Cycling Shoe Covers, the CASTELLI Pioggia 3 Cycling Shoe Covers, or the CASTELLI Diluvio UL Shoe Cover) and a winter weight sock (such as the SPORTFUL Checkmate Winter Socks).
- 0-5°C: As temperatures continue to drop, you can swap out that lightweight shoe cover for a thermal shoe cover and stick with the heavier sock. If you only want to invest in one shoe cover, this is it. If you don't mind the extra bulk, it will be effective at slightly warmer temperatures as well by sticking with a summer sock for a bit longer into the season.
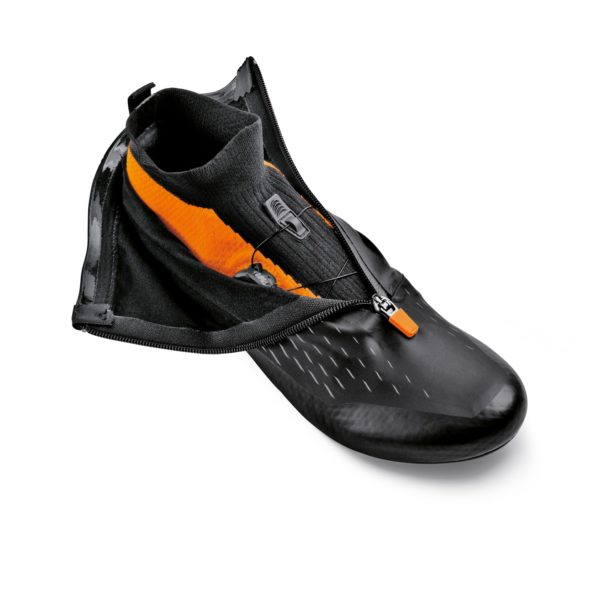
- <0°C: Here again it's all about layers – try a summer weight sock (at NOMAD, we stock a wide range of socks for men and women) underneath your winter socks and stick with your thermal shoe covers. And, if you're serious about cycling in cold weather, check out the winter offerings from DMT - the DMT WKM1 Winter MTB Shoe and the DMT WKR1 Winter Road Shoes. These winter cycling shoes are designed to wear like your high-quality summer road or MTB cycling shoes, but have the covers built in over a knit design – the integration makes them warmer than any shoe/cover combo.
Eyes:
As with any season, wearing sunglasses when on the bike is a must to protect your eyes from flying debris, bugs, and the drying effect of strong winds. The winter season is no different and it's perhaps even more important to protect your eyes as the cold wind can make your eyes water. Canadian winters are often cloudy and overcast, so opting for winter cycling glasses that are lighter in tint can be beneficial. At the opposite end of the spectrum, when there is snow on the ground and the sun makes an appearance, you will need something darker as the glare can be intense. We recommend taking a look at photochromatic lenses if you just want one pair, which can set you up for all occasions and even work if you get caught after dark with the short days. Most brands offer photochromatic options, but we particularly like those from Alba Optics for both your summer and winter cycling gear.
How Far Into Winter Can You Cycle?
Cycling throughout the year in the Great White North ushers in a few challenges, but with a few critical winter cycling gear essentials, a basic of understanding of layering, and a bit of practice, you can experience all the beauty of the seasons. Yes, some days it will just feel easier to dial up Zwift or TrainerRoad and hit the indoor trainer, but when you're craving fresh air and your gravel bike is calling, indulge yourself!
Full Disclosure: We’re cyclists – not manufacturers. This guide is based on our own experience riding in the fall and winter in Canada – to help you decide what is right for you. Decisions on what to sport - or not - are strictly yours to make based on your own individual needs and preferences. Ride safe!


