In this beginner's guide on how to clean your bike, we present 8 easy steps to return your bike to its pre-outdoor riding glory.
Here in our neck of the woods, we were tremendously lucky with the (mostly) warm and dry summer/early fall we had. If you're like us and you made the most of the heat to ride outdoors, then your bike has probably endured a tough season of relentless riding—on and off the road. Now that you're slowly transitioning your bike onto an indoor trainer, or perhaps simply extending the outdoor riding season through until winter, your bike could probably benefit from a bit of love (particularly if you're a MTB'er or gravel rider and have been hitting the trails).
The good news is that the process to clean your bike can be as comprehensive or as simple as you want it to be. You don't need to dedicate an entire Saturday to get it done (but you could if that's what your heart desires).
Before You Get Started
Before you get started, you might want to consider a space in which you can easily maneuver and one that could endure a splatter of grease or two—perhaps in your garage or driveway if you have one (your loved ones may not be as thrilled by the sight of your bike perched on top of the coffee table). Additionally, we like to lay cardboard or a tarp on the ground to protect against any grease.
To aid you in the process, you might even want to consider a bike stand to avoid hunching over your bike (what's the use of a clean bike if you're too sore to ride it?) and enable easier cleaning of the drivetrain and undercarriage. A stand elevates the bike off the floor and makes it easier to get to the hard-to-reach corners.
Now that you are settled into a proper workspace, you are ready to begin.
What You'll Need
Start by collecting all of the cleaning supplies and accessories you will need to clean your bike (otherwise, you may find yourself running around trying to chase them down once you've actually started cleaning your bike). Like the process itself, cleaning supplies you use for your trusty steed can be as elaborate, or as simple, as you choose. That said, we recommend a handful of basics that you should stock up on if you don't have them sitting around in your workshop already:
- One bucket (two if you have a spare one lying around)
- A handful of cloths and/or sponges
- Brushes (you can keep it simple, or get fancy)
- Soap (we use our household dish soap)
There are other supplies and accessories that you can treat as optional (if you want to keep it simple) that we use when cleaning our bikes:
Last but certainly not least, if you are keen to go above and beyond, there are other supplies and accessories you could lean on to give your bike the VIP treatment, such as:
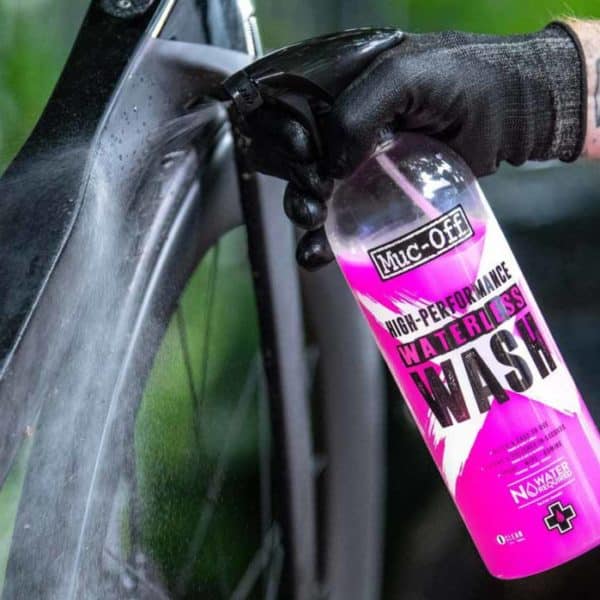
- Waterless Wash (this is an option if your bike cleaning set-up doesn't allow for easy access to water and/or if it isn't conducive to splashing water around)
- Bike Protect (this drives out moisture and leaves a sparkling, non-sticky protective layer on your frame, drive chain, metal parts, and paintwork after cleaning)
- Matte Finish Detailer (if your bike frame is matte and you want to apply a protective finish that will keep your bike's matte surface streak and gloss-free, and reduce dirt adhesion)
- Shine (if you're after a high-quality polish and protectant that delivers a deep and luxurious shine for your bike)
- Bike Pressure Washer (if you want to go all out and it's also great for everything else you might want to shoot water at)
Because these are optional, we won't capture all of them in our bike cleaning steps below.
If you don't have these staples and want to skip the hassle of purchasing each one, you could consider a cleaning kit that typically features the basics you'll need to get the job done.
Step 1: Lay Out the Supplies
The first step of this beginner's guide on how to clean your bike is pretty straightforward: Now that you have collected all of the supplies and accessories you'll need to clean your bike, you can get started (at last!). Begin by laying out your supplies and accessories so they're at arms-length and you can easily reach for them when you need to. Then, fill the bucket (or buckets) with warm water and soap.
Step 2: Remove the Wheels
If you're working with a repair stand, you'll want to get the wheels off. Working without wheels on the bike allows you to get into the difficult to reach crevices, particularly on bikes that are built to be aero and have tight tolerances. Removing the wheels is pretty straightforward because we know you're all able to change a flat (right?!) and it does allow you to do a better job on the cleaning process. If you don't have a repair stand, it's likely easier to leave the wheels on or suspend the bike from a makeshift apparatus. It will be a bit more difficult and you'll miss some spots, but you can still get your bike looking great again.
Step 3: Degrease the Drivetrain
We like to start with our drivetrain as it is easily the area of your bike that undergoes the most wear and tear, particularly if you're hitting the trails or backroads, and perhaps aren't always diligent about keeping it clean. Plus, your chain has a bigger impact on your performance than you realize (many watts are lost when your chain is gummed up or running rough), so try to be diligent with its upkeep. Doing so will make your entire drivetrain last longer as well.
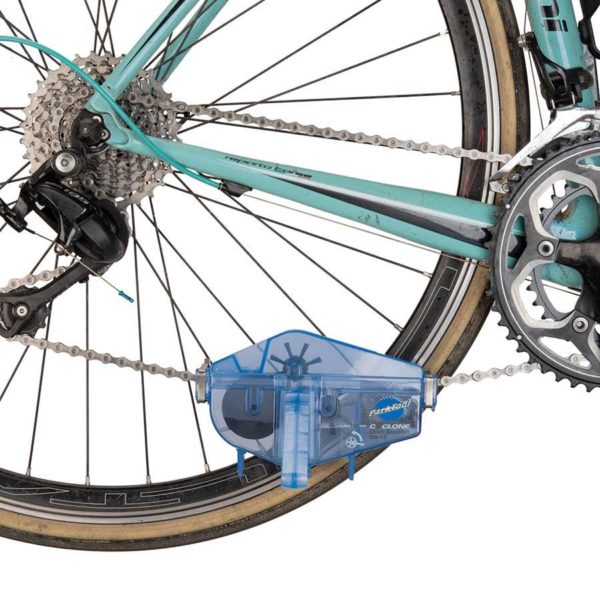
The best way to clean your chain is with a chain cleaning tool, like this one from Park Tool. You can simply clamp the tool onto your chain, fill it with degreaser, and pedal backwards for 30-40 seconds and the gunk comes right off. If your wheels are off your bike, you will benefit from a Chain Keeper to allow your chain to run freely and not damage your frame.
After the initial degreasing, we like to let it sit for a few minutes so the degreaser can really work it's magic. You can then give it a few more spins and remove the cleaning tool. Be careful to either use biodegradable degreaser or dispose of the dirty solution thoughtfully. Now repeat the process using soapy water in lieu of the degreaser, to finish the job and begin cleaning the degreaser out of the links.
On to the rest of the drivetrain. Submerge a stiff-bristled brush into the bucket of soapy water and use the brush to scrub the chainrings. Make sure you get into the hard-to-reach nooks and crannies around the teeth and rings. Follow a similar process for the cassette, applying soap to the cassette, scrub, rinse, and repeat as necessary.
You'll typically want to use degreaser on the chainrings and cassette as well, but be careful to avoid squirting degreaser directly into the bearings of the hub and bottom bracket. Pro tip: tilt the rear wheel cassette side down as you apply degreaser to the cassette to avoid it dripping into the bearings and degreasing the freehub body. Generally, use degreaser sparingly on the cassette. If it's really messy and you want to get in there more aggressively, you can remove the cassette from the wheel and soak the entire thing in the solution.
When you're satisfied with the cleanliness of your drivetrain, gently rinse clean with water (ideally with a hose, if it's easily accessible).
Step 4: Wash Everything Else
Cleaning the drivetrain really is the hardest part of the whole exercise and with that behind us, we're ready to wash the frame and other parts.
If you started with only one bucket of water, then you should refill it with clean soapy water before you start lathering the greasy water on that sweet custom paint job. If you have a hose handy, give the entire bike a gentle spray so the dirt begins to soften. You can also spray on some specially formulated bike cleaner at this stage, which cuts dirt more easily and is helpful if you lack access to a hose.
Submerge a (clean) sponge, soft brush, or cloth into the bucket of water and apply along all surfaces of the frame to gently remove any dirt from the bike frame. Our advice: use lots of water and we mean lots - bucket in one hand, sponge/cloth/soft brush in the other, constantly re-dunking your tool of choice. If you're after more oomph (if you're having a hard time getting some of the gunk off), you could also use a specially formulated bike cleaner after the initial scrub to cut through dirt, add some sparkle, and protect your paint.
We like to clean our bikes in a methodical way—from front to back (for example, starting from the handlebars, to the stem and headset, to the fork, along the head/top/down/seat tubes, seat post, seat and chain stays, and so on). Regardless of which end you start at, go high first and work your way down.
A variety of different brushes are helpful to get into all of the tight areas - beneath the bottom bracket, between the fork blades, and around components, such as brakes and derailleurs. When you're finished, give everything a close look as it's easy to miss spots despite your diligence, and then thoroughly rinse the bike from top to bottom.
Optionally, dry the bike with a microfibre cloth or any other (clean!) cloth you have laying around that won't scratch, or otherwise damage, your paint. Yes, many people just let the bike drip dry, but if you want to have the highest quality shine, wiping it down is best.
For most of us, this is typically a pretty straightforward step. If your bike has a sensitive finish, however, be wary of what you apply to the frame (dirt sucks, but damage is worse).
Step 5: Clean the Wheels
We like to clean the entire tire/wheel combination and start by running a soapy cloth around the full circumference of the tire to remove loose dirt. We then scrub around the rim (both sides and between the spokes) with a soft brush or sponge and work our way toward the hub. Don't forget the spokes - it's slightly tedious, but gently wrap a cloth around each spoke individually and clean from rim to hub.
The hub itself can be a bit difficult to get at and we find a 'bottle cleaner' brush most helpful to get in between the spokes and really scrub the hub clean. As with the rest of the bike, use plenty of water to ensure you're breaking down dirt and avoiding scratches.
If you have disc brakes, this is a good opportunity to clean the rotors. Your bottle cleaner brush will come in handy here as there isn't much clearance to get your fingers in. There are special rotor cleaning solutions available if you're having squealing issues, but most of the time soapy water will work here too, just take care to thoroughly rinse the rotors (and the rest of the wheel) with water when you're done.
Step 6: Put it all Back Together
You're nearly there!
Anything you took apart can now be put back together. If you've got your bike on a stand, we like to put the back wheel in prior to the lubrication step, below. Give the cranks a good spin and get the wheel spinning to shake off residual moisture - it's ideal to have a dry drivetrain before you start lubricating.
Step 7: Lubricate and Shine
We hate to be the bearer of bad news (and you are probably fully aware of this already), but you should be keeping your bike properly lubed at all times. Immediately following a wash is critical as you have washed away some lubricants beyond just the chain.
We like to start with with a frame and component protector, such as Muc-Off Bike Protect. You can use it fairly liberally and gently wipe away the excess to protect your frame, but also all of the moving parts. Just be careful to avoid applying lubricants to your brakes or rotors by covering them up when spraying. You can then use spray lubricants to pinpoint some of the smaller working components such as pivot points in your derailleurs and shifters. Don't overdo it - less is more - as excess lube attracts dirt.
To properly lube your chain, ensure you're selecting a lube that is right for the conditions. If you primarily ride in dry weather, you can use a "Dry" lubricant that will attract minimal dirt. It does need to be applied more often, but reduces the amount of clean up of a "Wet"
lubricant or even "All Conditions" lube. Dry lubes don't work well in wet conditions as they wash away too quickly (obvious?).
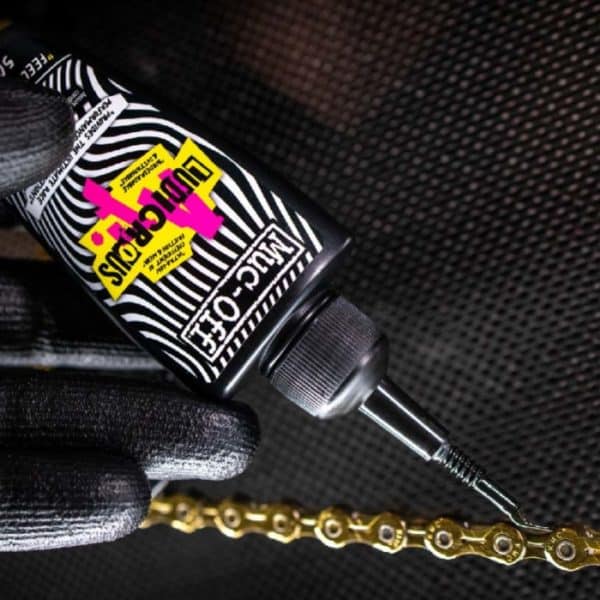
Regardless of the lubricant you choose, we recommend drip products rather than spray on. Chain sprays are fast and convenient, but are wasteful and apply lubricant everywhere - even where it isn't needed, which attracts dirt.
Applying the lube to the chain is simple and we recommend taking note of a starting point (power links are helpful!) and then applying a small drop to each link pivot along the chain. The lube is needed inside the links and is best applied along the bottom i.e. the inside of the chain. When you're finished, spin the cranks backwards a number of rotations to work everything in. Remove any excess lube using a clean cloth, which is particularly important if you've used a spray lube or a wet lube, which are thicker and tend to end up heavier than is required.
Side note: if you've got your bike up on a stand, this is a great time to take a spin through the gears, adjust your derailleurs, and ensure everything is working as intended.
Step 8: Give Yourself a Well-Deserved Pat on the Back
You're all done! Go on. Take pride in your shiny bike. We like to let it rest after a wash to let everything fully dry and lubricants to work fully in, but if you're not too pooped from the hard labour, you might even consider showing off your bike with an easy spin around the block.
Full Disclosure: We hope this beginner's guide on how to clean your bike has been helpful. But remember: Every bike is different. You should do your own due diligence. Ensure your bike cleaning routine is appropriate for your situation to increase the lifespan of your bike and its parts, and to reduce the risk of damage. Then, once you have a ritual that works for you, stick to it and ensure you're regularly (and diligently) cleaning your bike. You'll be glad you did.