
If you've clicked here, you're probably a road/gravel rider, right? Maybe you're a mountain biker wondering why roadies are still talking about tube vs tubeless bike tires? Or maybe cycling is a new hobby for you and you're wondering what all the hubbub is about on tubeless bike tire set ups - labels like 'tubeless ready', or products like tire sealant, tubeless valves, and fancy rim tapes?
Regardless, there's good news - it's a well-worn path - cars have been using tubeless tires since the 1950s and, even in cycling, mountain bike tubeless systems have been around (and used) for 20+ years. We've done the research for you to ensure you're ready to take the plunge to jettison your inner tubes or opt out and stick to ye ole faithful inner tube a while longer.
So, why all the noise recently? Our opinion: Cyclists are rediscovering the joy of just riding a bike, and that means gravel, dirt roads, and off-road forays into the unknown - which means wider tires and a desire for more comfort. Even if you're a die hard, race the clock and your mates, 'only the most aero jersey will do' roadie, modern thinking (and research) around aerodynamic profiles, rolling resistance, and pressure of various tire widths and configurations might suggest you've been barking up the wrong tree for... well, ever.
Not to worry, we're going to delve into every aspect of going with tubeless bike tires so you can decide if they're right for you.
It's topical: Jumbo-Visma opted to switch to tubeless bike tires at the 2022 Tour de France for the stage 5 cobbles following wheel collapse incidents. It seems the team was keen to avoid a repeat of the Paris-Roubaix incidents during which two tubular wheels collapsed as a result of punctures.
Luckily for these riders, they simply need to keep riding until the team car arrives to relieve them of the damaged wheel/tire (the rest of us are not so lucky). Evidently, these pros trust in tubeless bike tires enough to ride them when the stakes are as high as they are. This is newsworthy considering the traditionally-stodgy approach of the pro peloton is one reason the adoption of road tubeless bike tires has been slow.
We know it seems self-explanatory, but understanding why bike tires have traditionally used inner tubes to hold air may help explain the added complexity of tubeless bike tires. Maybe you've wondered why you don't have inner tubes in your car tires? Well, go back far enough and your car would have had inner tubes, too. In fact, the tubeless tire wasn't invented until 1947 (in response to high fuel prices... sound familiar?), but was quickly adopted thereafter. So, why didn't bikes follow suit soon after? The challenge is the spoked wheel. Early cars also used spoked wheels and the problem with spokes is that it makes an airtight seal rather difficult to achieve.
We still have spoked wheels on our bikes, so why are we seeing a push towards tubeless bike tires now? Rim, tire, and adhesive fabrication/technology have come a long way to make it all possible. But first, a little bit of background.
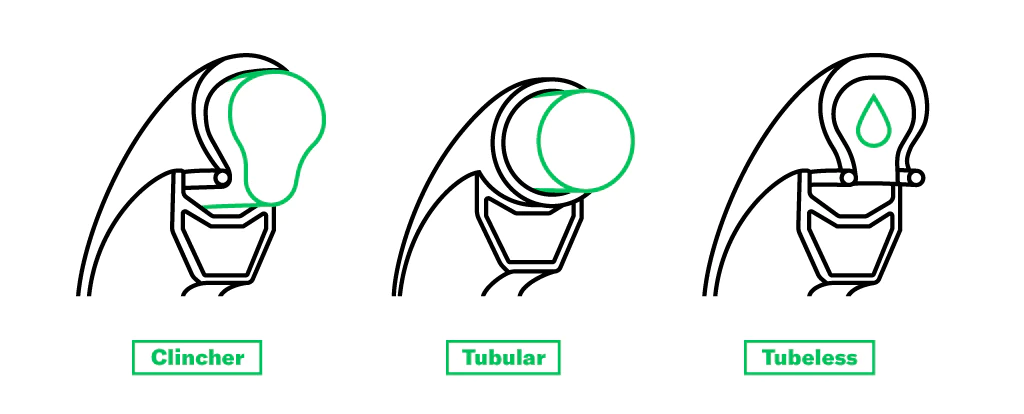
Traditional clincher designs use the inner tube as the internal air seal and, once inflated, small hooks on the inside of the rim and outside of the tire bead hold the tire in place. The system isn't intended to be airtight and there is tolerance for imperfections because the tube holds the air, not the tire. The main benefit here is the simplicity of setting it up and the low maintenance with little knowledge required to change a flat mid-ride.
Tubular designs, which are still fairly prevalent in the road pro peloton, are glued to the rim, and the tube is effectively sewn into the tire itself. The main benefit is low weight and the fact that flats tend to lose pressure slowly, while being semi-rideable. Unfortunately, when they do go, they are a bit of a handful to change. If you happen to have someone driving around behind you with spare wheels, this might still be a great option for you... For most riders, the hassle of gluing the tire to the wheel and utter fear of being forced to change a flat out on the road is enough to look for the nearest clincher or tubeless system.
Tubeless bike tires work by completely sealing the tire and rim combination to be airtight, and rely on specifically-crafted rims and tire beads with the assistance of high quality rim tapes and specifically-designed tubeless valves to maintain pressure. The air pressure itself is what keeps the tubeless bike tire on the rim.
Pure tubeless rims are designed to have a separate channel where the spokes enter, producing a smooth airtight surface for the tire. The spoke nipples are then fished through the valve hole, one at a time, with the help of a magnet to build the wheel. Tubeless rims don't require rim tape.
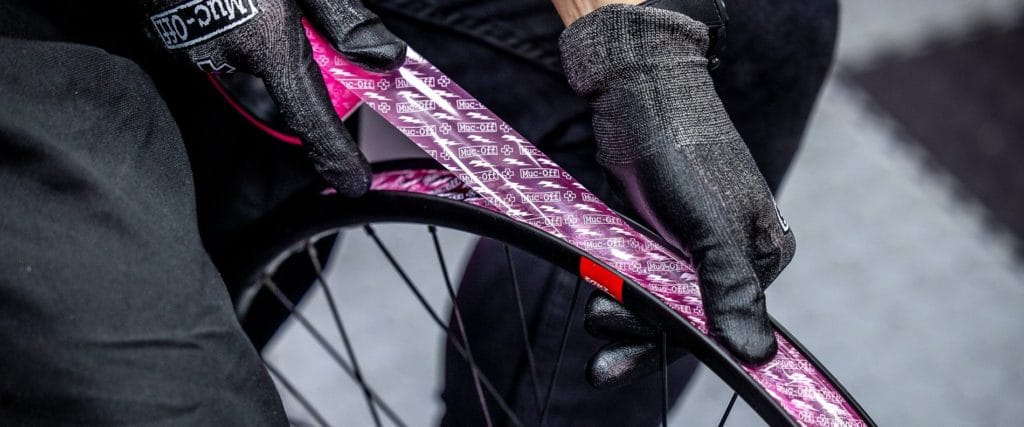
Tubeless-ready rims, on the other hand, look more like a traditional spoked wheel with spoke holes along the center channel. The holes are covered with sticky (non-tubeless rim tape isn't always sticky) tubeless rim tape to ensure that an airtight seal is created.
Both tubeless and tubeless-ready rims require the use of a tubeless-ready tire. Tubeless-ready tires have a specially-designed, typically carbon, bead that won't stretch to the same degree as traditional tires. Obviously, the tire needs to stay rigidly fixed to the rim at all times; otherwise, the air will escape (this is called 'burping'), and your tubeless bike tire will just be a flat tire.
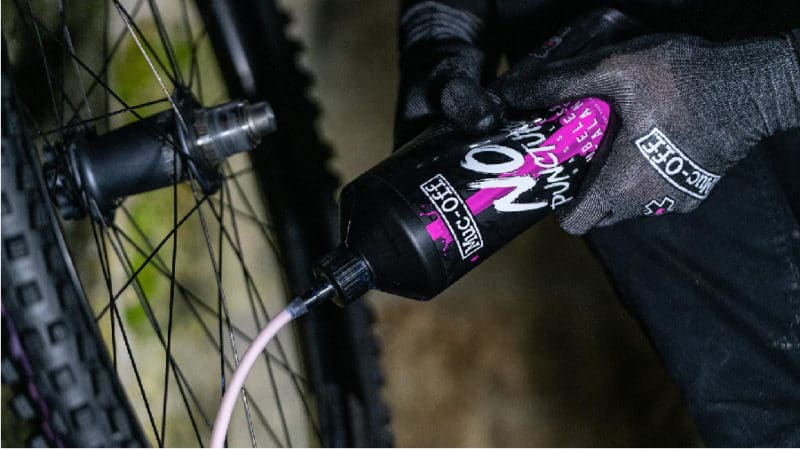
As an added bit of complexity, tubeless bike tires benefit from tubeless sealant injected or poured into the tire to help with the sealing process. In practice, you can often get away without it, but it does help to seal up any punctures that may occur, and it slows the air loss process, which is faster in tubeless than in a traditional tube set up.
In the list of tubeless bike tires pros and cons the first, most obvious advantage of opting for tubeless tires is decreasing the odds of getting a flat mid-ride. If a puncture does occur, that sealant you injected inside the tire will typically seal the hole, which means you can continue to ride even after a puncture. In fact, most often, you won't even know that a puncture occurred as many sealants on the market can seal holes up to 6-7mm in diameter and it happens virtually instantly. That's pretty impressive as a hole that large would cause instant air loss in a tubed tired. We've all been running tubeless bike tires at NOMAD for some time - and the lack of flats is astonishing.
If the hole is too large and you suffer a flat in spite of your (well maintained?) sealant, you can simply insert a tube to get you through the rest of your ride.
Not only do tubeless bike tires experience fewer punctures, but going tubeless means you can ride with a lower tire pressure without fear of the dreaded pinch flat. What's more, lower tire pressure is the best way to absorb surface shocks and make your ride feel more compliant, particularly on rough terrain.
We know, we know: Conventional wisdom would suggest that lower tire pressures mean lower speed, but comfort on long rides means less fatigue and less fatigue eventually translates into more power to the pedals. Plus, lower pressures on rough terrain mean better cornering grip so you can carve it up without the white knuckles.
But, lower pressure means more rolling resistance, right? Well, not exactly. Certainly, riding around on a flat isn't fast, but gone are the days of pumping your tires to the maximum pressure on the sidewall as you want your tire to stay glued to the riding surface rather than jumping up and down and generating a harsh, fatiguing ride.
Modern thinking suggests more rubber in contact with the road will produce a faster overall ride. This is a slightly complicated topic best saved for a future blog on tire widths and pressures, but the take-away here is this: Optimal tire pressure for comfort and speed varies with the terrain and tubeless bike tires provide a much wider operating window.
An additional speed advantage of tubeless bike tires? Friction between the tube and tire is eliminated, which makes a tubeless set up roll faster. This is analogous to the benefits of using latex tubes. Yes, often latex tubes are used for weight savings, but they are also more supple and stretchy than butyl tubes, which means less rolling resistance as the tire/tube combination maintains a better connection and flexes as a unit to absorb road imperfections rather than bouncing over them.
We are often asked whether tubeless bike tire set ups are lighter than traditional tubed tires. We've been witness to some spirited debates of reductions in rotational mass (always considered the worst kind of added weight in cycling) as reason enough to make the switch. Unfortunately, it's not as simple as subtracting the weight of the tube.
Typically, tubeless bike tires weigh slightly more than a traditional clincher tire because they are built to be more robust with a stronger bead to ensure air doesn't leak. Additionally, the use of tubeless sealant is recommended, which adds a few more grams per wheel. In our experience, when you add it all up, a properly provisioned tubeless bike tire will come out about the same as a tire and tube combination.
So why have we flagged this as an advantage? While the tire itself isn't lighter, the rim might be. The rise of tubeless bike tires is giving rise to new methods of manufacturing wheels, specifically greater adoption of hookless rim profiles.
Traditional rims have a small hook around the inside of the rim, which helps to hold the tire in place and ensures it doesn't blow off the rim, particularly under the high pressures used in road cycling. But now, tires are getting wider for comfort (and speed), less pressure is required with wider tires, and tubeless bike tires are more robust to prevent air burping. The net result? Hookless rims found on cars and mountain bikes are on the rise in road and gravel.
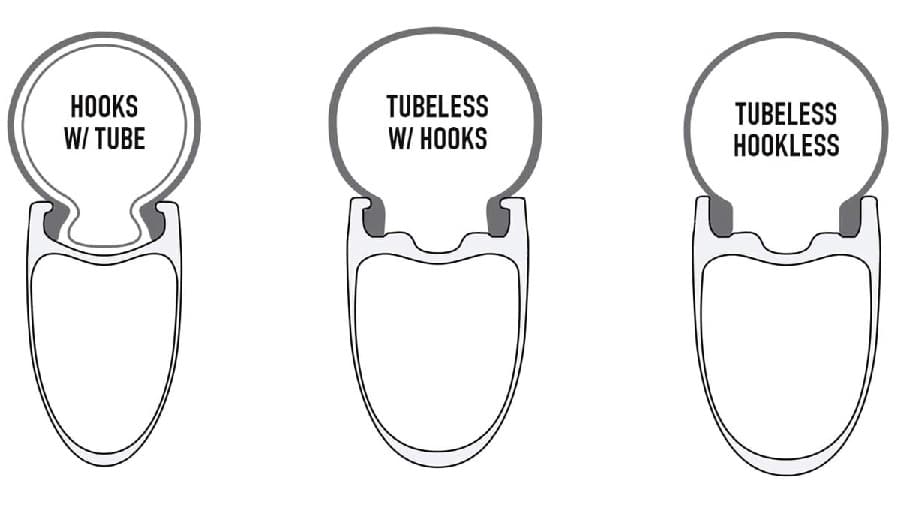
Hookless rims use less material (typically carbon), which means less rotational weight where the rim meets the tire. The weight savings of a hookless rim can be relatively substantial while also reducing the cost of manufacturing. But a word of caution: Not all road and gravel tires are compatible with hookless rims so be sure to read the specs of your chosen combination carefully.
In addition to the benefits of improved handling from appropriate air pressures, a properly-maintained tubeless set up can be safer considering it is designed to seal itself in the event of a puncture (punctures that don't self-seal are easy to fix with a tire plug). Anyone who has experienced a sudden flat when riding at high speed can attest to the horrifying feeling of losing control of your bike as you're staring down a steep descent. Technically this is an advantage of fewer flats, but we're always happy to pump up (pun intended!) safety enhancements.
That's a whole lot of upside. But what about the disadvantages of tubeless?
Well, for one, tubeless-ready tires and wheels typically cost more. At least at the moment, tubeless bike tires are a bit more expensive and you have the added cost of tubeless sealant. You will save on tubes and replacement tubes, but - on the whole - tubeless is slightly more costly. In addition, the one-time transition from tubed to tubeless can carry a significant price tag, particularly if you need to replace your wheels.
To get started, you need a tubeless ready (TLR) wheelset and tires, which is an investment. You don't need to rush out to do this, but if you’re planning to splurge on a new bike, watch out for models that come equipped with tubeless ready wheels.
For those nasty tears or holes that are just too large for your tubeless repair kit, you may still need a spare tube to get you the rest of the way. That means, you might still find yourself relying on tubes and almost certainly still carrying one around with you (even if you are going tubeless).
While tubeless set ups may generally be easier to manage, they do require a bit more ongoing maintenance. In particular, air tends to escape faster in tubeless bike tires than in a traditional tube set up, which leaves you topping off your pressures before most rides (even with tubes, you should check your pressures regularly).
Moreover, sealant can escape if the tire bead comes away from the rim owing to a sudden impact, and sealants that coagulate need topping up every six months or so. Even without incident, the sealant seeps through the tire and evaporates over time. The maintenance is all quite simple and in the wheelhouse of any home mechanic, but it's slightly messier than a simple inner tube that you forget about until you have a flat.
The short of it is: It depends. The decision of tubeless vs tube bike tires typically comes down to two major considerations: What terrain you typically ride on, and what your budget is.
Tubeless options will most significantly benefit cyclists who ride off road, but as road tires trend towards wider variants, it's becoming a more natural progression for riding on the road as well. The drastically reduced number of flats is reason enough and you will enjoy less rolling resistance.
Budget is a consideration, but is more about timing. You don't need to rush out and replace your non-tubeless ready wheels just to get rid of your tubes. Most of us aren't racing the Tour de France anytime soon, which means we probably don't need to overinvest in the lightest tires with the lowest rolling resistance (though most of us kind of want to...).
Because we dislike leaving our readers with the 'it depends' response... our take? It's time! We recommend going tubeless for all types of riding, but suggest waiting for the natural time when you're buying a new bike, or investing in a new set of wheels. Already have tubeless ready rims? Then go for it. Here at NOMAD, we've gone tubeless on all of our bikes, and we haven't looked back.
Cycling saddle sores can be an awkward topic. If you’ve ever spent significant time in the saddle riding your bike with any degree of consistency, or perhaps even if you haven’t, you have no doubt experienced those dreaded cycling saddle sores. Saddle sores can range from minor irritations to what feels like you’ve got a tack stuck in your sensitive bits every time you saddle up. If you haven’t experienced it – trust us when we say, you don’t want to.
For those of you that have suffered through cycling saddle sores, this is a silly question. For those of you who haven't: Cycling saddle sores are awful little mounds of ride-ruining discomfort, of course. But, for those of you new to this (lucky you!), or trying to figure out what that awful pain is, a saddle sore is a raised area of skin or a boil, which is most often caused by an abrasion from chafing or an infected hair follicle. Sometimes, saddle sores sit underneath the skin and present as a swollen area that feels bruised. In the worst cases, these pesky treasures can even require draining (don’t do it yourself) or antibiotics. Yikes!
While not perfect, the good news is that there are ways to prevent cycling saddle sores, which we will describe below.
As with so many things, the best treatment for cycling saddle sores is to prevent them from happening in the first place. Putting a little bit of care into your kit selection and pre/post-ride rituals can go a long way to ensuring you aren’t doing your next century ride standing on the pedals. Here are our top tips for preventing cycling saddle sores.
We’re no longer shocked when we ask people how they selected their saddle and they say, “it came with my bike” (gulp!). This could work, but it’s a real wildcard. Contrary to popular belief, saddles are not one-size-fits-all, and it’s critical to find a saddle that doesn’t create chafing. Everyone’s anatomy is slightly different and we believe it requires a bit of science rather than trial-and-error to find the right fitting saddle.
Ideally, the width of your saddle suits your anatomy and can accommodate your riding style. The width of the ideal saddle is generally determined by the width of your sit bones. Hardcore riders typically prefer a saddle that provides pressure relief at the front while those who tend to focus on more endurance rides seek out more padding at the rear to suit an upright position.

Fortunately, many saddle companies, such as Selle Italia, have come up with fit systems that can remove some of the guesswork. It has developed idmatch technology, which uses a strict scientific method to help cyclists determine their ideal seat size.
If there’s one thing we don’t mess around with, it’s the quality of our bib shorts (for men and women alike). They can be the difference between an epic ‘Tour de France, here I come!’ ride and a painful ‘I wonder if I could get an UberXL to pick me up’ nightmare.
First and foremost, ensure your shorts fit properly: Shorts that are too big could move around, which could cause chafing while shorts that are too small will dig into your body in uncomfortable ways.
Secondly, remember that most bib shorts feature a chamois. In a nutshell, a chamois is a napped cotton-flannel blend that provides a layer of padding between the body and the saddle to reduce friction between your butt and the bike. But - beware - the quality of chamois pads do vary. A quality pair of cycling shorts is made of durable compression-oriented material and has seamless stitching that sits flat against your skin and away from areas that are likely to be flexing with each pedal stroke.
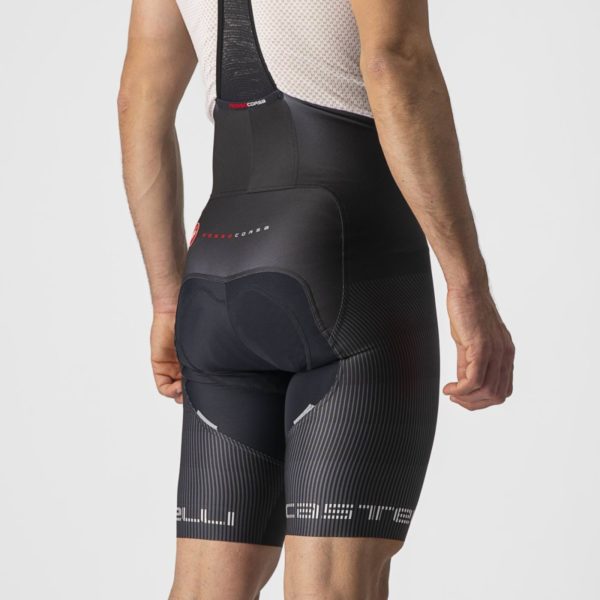
Often, when the dreaded saddle sores start, riders reach for the thickest chamois that they can find. We’ve often found this to exacerbate the issue. A short that is too thick will make the saddle fit poorly - there’s just less room for your legs to move around freely. Sometimes it even makes more sense to reach for a thinner chamois to reduce the pressure on the sensitive area. It’s slightly counterintuitive, but experiment with different thicknesses of chamois to see what works best for you.
For even more protection, consider applying chamois cream (particularly if you’re planning a longer ride).
We get it. For a number of cyclists – amateurs and professionals alike – this step can feel a bit too messy (and awkward). But it’s one you won’t want to skip if you're prone to saddle sores. The magic behind chamois cream is simple: It’s an anti-bacterial, viscous substance that helps to prevent germs from forming and reduces friction between skin and clothing (aka the chafing that can occur during a long ride). It typically contains soothing ingredients, like aloe vera or shea butter. You can find it in a number of forms, including balms, creams, and even powder.
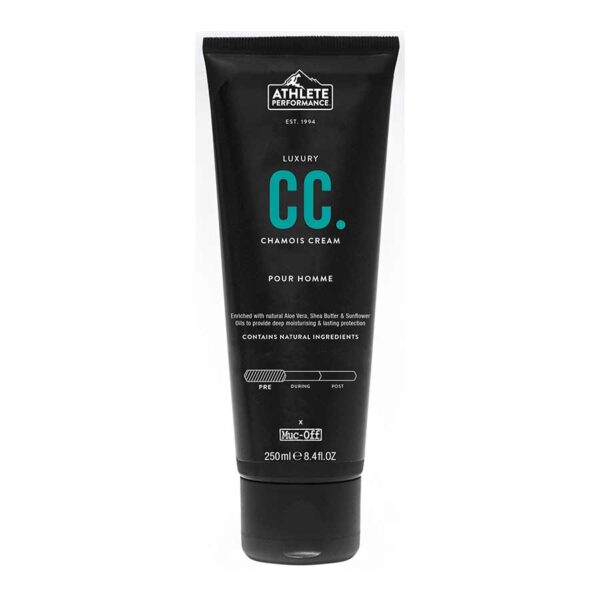
Applying chamois cream is easy: Simply apply the cream directly to the skin, specifically where your body meets your saddle, and - then - put your shorts on. Not sure exactly where to put it? The area you feel most likely to develop a sore should do the trick. And remember, these aren't saddle sore ointments, but rather a preventative measure.
If you rode hard, it’s easy to be tempted to sit around in your bibs when you return - but don’t! Trust us: You’ll be glad you didn’t. Remember, too, to wash your bibs after every ride. Because bibs sit right up against the skin (without the added layer of underwear), they should be washed just like underwear - after every use.
Rule of thumb? Plan to remove your bibs immediately after your ride (and wash them!) - and, if you’re driving out with your bike and won’t have easy access to a shower - you’ll definitely want to remove your bibs after your ride so you’re not stuck in them on your drive back. Try to shower as soon as you get back, and put your bibs in the wash. Remember, it’s important to keep those sensitive bits clean and dry. Then, sit down and relax, and pop a recovery shake - another epic ride for the books!
Alright, this is (yet another) awkward topic, but it’s an essential consideration in staving off those cycling saddle sores. Cyclists have a bit of a reputation for shaving their legs (spoiler alert: we do, too), but we’re not really talking about your legs per se, are we?... So, should you run up the thigh and keep right on going? Well, maybe not. Hair provides a natural protection barrier for your skin and slicing it off can make the area more sensitive so proceed with caution or stick to trimming.
Ultimately, what you do in your pants is your business, but shaving means the hair will eventually grow back - and regrowth poses the risk of ingrown hairs and infection of the follicles. If you are going for the smooth look, make sure you pay special attention to the other items on this list - shorts, creams, and good hygiene.
Saddle sores are typically at their worst following prolonged periods of riding, which is pretty straightforward: More riding means potentially more chafing, which opens up the possibility for more saddle sores. A simple antidote is to take a rest day (or two, or three, …) - and to wear loose, breathable clothing while you do. Spending time off the saddle will give the affected area the opportunity to heal, which will ensure you’re back in the saddle (and enjoying it) in no time.
We know it’s tempting, but we recommend you resist the urge to take matters into your own hands (literally) by popping or squeezing saddle sores. That will likely make the recovery longer. Plus, popping or squeezing saddle sores could make your next ride even more painful.
This one is tricky and there is (as with many things) no one-size-fits all solution. Generally speaking, however, there is something to be said about proper nutrition. Some argue that Vitamin C and zinc support the formation of collagen, which helps the skin maintain its barriers, and therefore help avoid cycling saddle sores. Because zinc is lost through sweat, cyclists that are prone to sweat while in the saddle could potentially benefit from consuming zinc through dietary sources. But the jury is out on this one. As always, listen to your body and figure out what cycling nutrition works for you. It’ll be different for everyone.
In our own experience, minor saddle sores typically go away within a few days, but some can be more pesky and plague you for weeks or even months. If you are experiencing a particularly bad case and you think simple irritation may be turning into more of a saddle sore abscess, consider consulting a medical professional, like your family doctor.
The bottom (get it?!) line? Don’t let those pesky cycling saddle sores get in the way of an epic ride. Follow these easy steps to prevent them from rearing their ugly head. You’ll be glad you did.
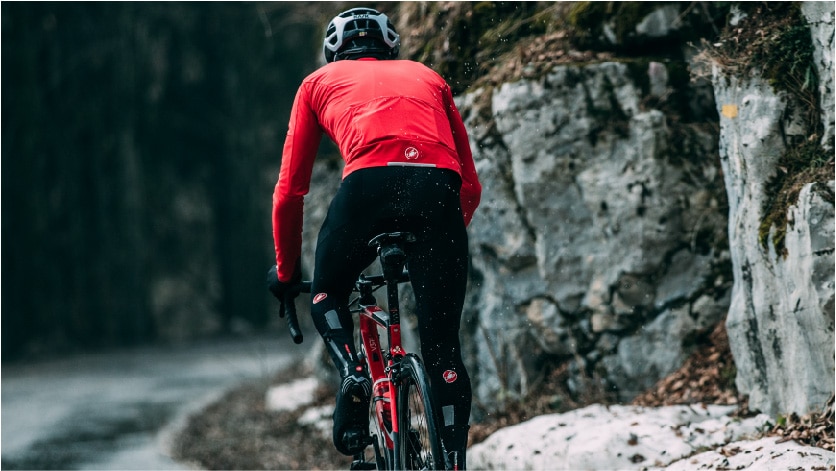
If you're like us, the close of the Canadian summer can bring with it a mixed bag of emotions. On the one hand, autumn cycling - with the changing colours and falling leaves - is arguably the loveliest (and most picturesque) season of the year to be on a bike. The temperatures, at least at the start of the season, can be beyond comfortable and possibly even enhance your performance as you escape the hot, humid, sweaty days of summer for cool breezes and a crisp atmosphere. On the other hand, we can't resist thinking ahead to the stark days of winter with snow on the ground, slippery roads, and bone-chilling winds (yikes!).
Needless to say, you could always move your training indoors when the weather takes a nasty turn, but if you just aren't ready to give up on 'the cycling season' or to trade in rubber-on-road (or trail) for the tedium of pain cave sweat sessions, then read on to learn how to equip yourself to stay warm (almost) year-round and embrace all the variety that changing seasons can usher into your rides even here in Canada. Winter cycling doesn't have to be miserable and with the right gear it can really break up those trainer sessions.
Summer cycling is easy, right? Throw on a pair of bibs, a jersey, socks, and shoes and you're out the door. But, as temperatures start to drop, you will be compelled to dedicate a wee bit more of your routine to gearing up accordingly. Luckily, with practice, fall and winter cycling can become just as easy as summer cycling.
You have probably heard - going back to your childhood - that you should dress in layers to stay warm. Well, we're here to tell you this is as true in cycling as it is in tobogganing, but perhaps for different reasons. Conventional wisdom suggests that air trapped between the layers of clothing will keep you warmer, but - in cycling - we have to consider our working bodies beneath the layers: The perspiration that is created, the need for the skin to breathe, and - naturally - protection from the winds created by your forward motion. So, needless to say, shopping for winter cycling gear is a bit more complex.
We advocate the 'sandwich' approach to dressing for fall and winter cycling. The 'bread' is a solid base layer and outer shell while the 'peanut butter and jelly' is a combination of various mid-layer options depending on just how cold it is and how hard you will be riding. Not only does this allow for more warmth and breathability, but also allows for adding and removing layers as the temperature fluctuates throughout a ride.
To base layer or not to base layer in the summer? This debate could very well rage on forever, but no one will disagree that, once temperatures drop, a cycling base layer (for men and women) is a critical feature of any cyclist's winter cycling gear to keep them warm and comfortable on the bike. Today, base layers are available in a wide range of options and technical fabrics to wick moisture, speed drying, and promote a warm core. Here are some things to consider:
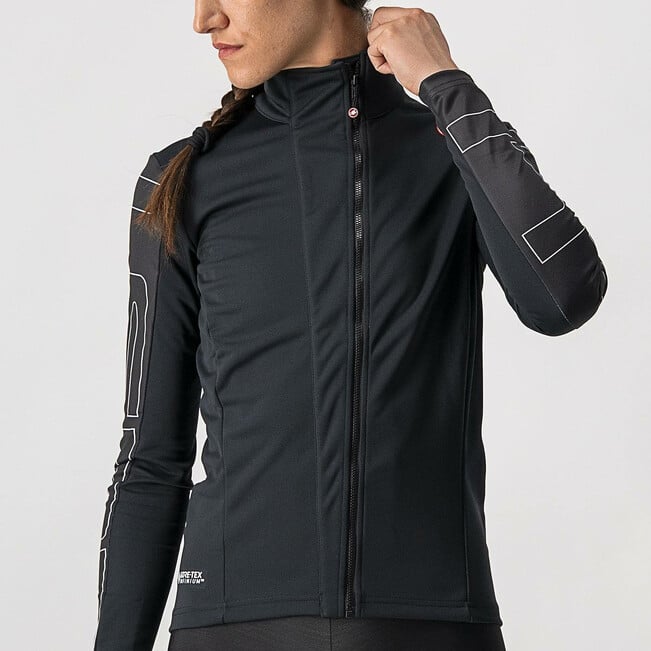
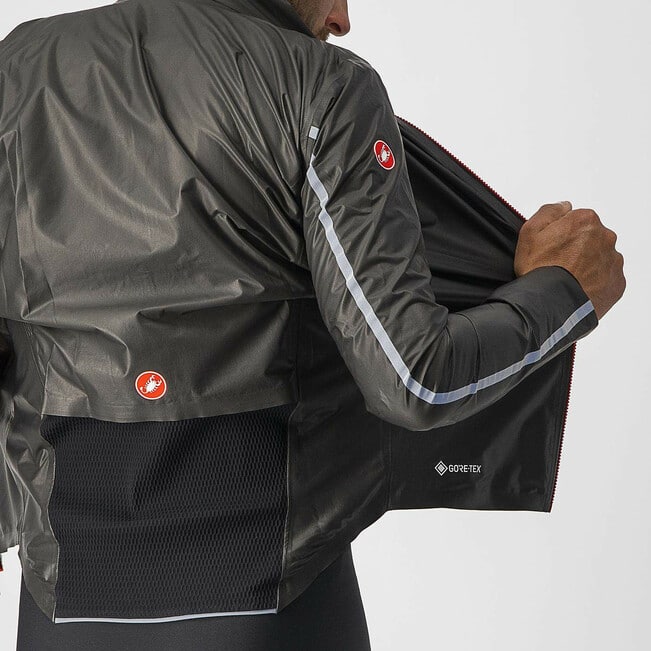
Similar to base layers, an outer shell (for men and women) is critical to staying warm on the bike as temperatures begin to dip. The principle is simple: Prevent the elements from fully penetrating your other layers. The challenge is achieving this in such a way that your skin can still breathe and moisture from underneath can find a path to the surface and out. The right shell and base layer combination can carry you a surprisingly long way into cooling autumn temperatures even without thicker mid-layer insulation. Fortunately, technology has come a long way in the last few years. Here are some considerations:
Now that we have covered the layer next to the skin and the layer exposed to the elements, finishing our 'sandwich' is a wee bit easier. In a nutshell, it means packing on enough layers for the ambient temperature and for the intensity of your ride.
It turns out that the old adage that 80% of heat is lost through our heads is a bit of a myth. The reason we tend to lose more heat from up top is because it's typically an area we leave exposed. Nevertheless, if you've done any riding in wintery conditions, you know that your ears, head, and face can become painfully cold (in that order) if left unprotected from the elements.
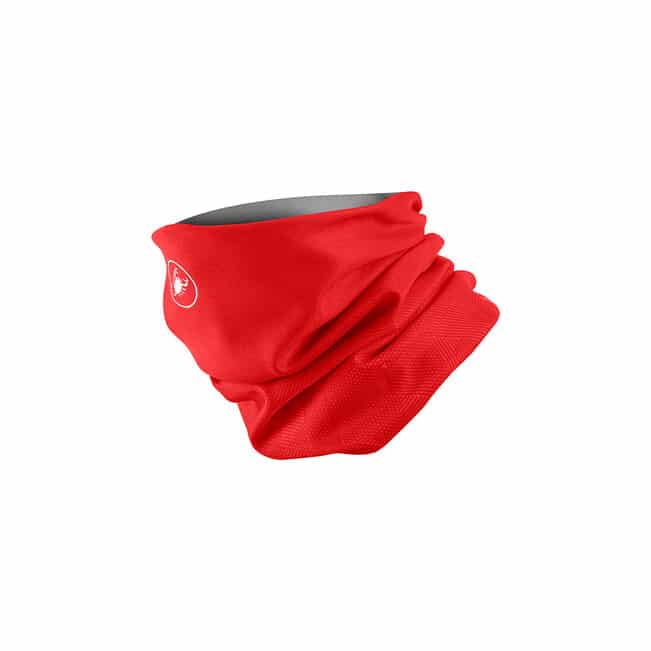
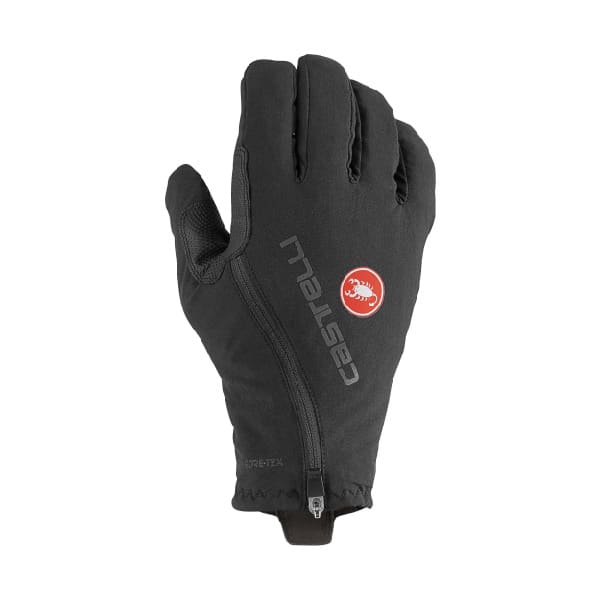
A cyclist's neck is so often forgotten - right up until that first gust of wind flows down into your perfectly layered core. Long flowing scarves are far from aerodynamic, but there are a host of products that aim to protect your neck and limit wayward winds from cooling your core, such as the CASTELLI Pro Thermal Head Thingy.
You don't need to go overboard here. Typically, one layer (as the temperature drops below 5-7°C) will suffice. Plus, products, such as the CASTELLI Pro Thermal Head Thingy, or a good old-fashioned balaclava pulled up over your mouth can help to prevent that pesky 'runners cough' after a cold weather jaunt. Last but not least, a final benefit as we continue to navigate the COVID-19 pandemic, these could serve in place of a forgotten mask for your mid-ride pit stop.
Maintaining the right amount of warmth in your upper core – from trunk to waist to neck – is where we can fully employ the layering techniques described earlier. Most of your perspiration comes from this area and overdressing just leads to different problems than underdressing. As we shared earlier, the main purpose is to wick moisture away from the skin. We don’t want to rehash the points above, so we'll dive into recommendations on how to get suited up for your next fall or winter cycling adventure.
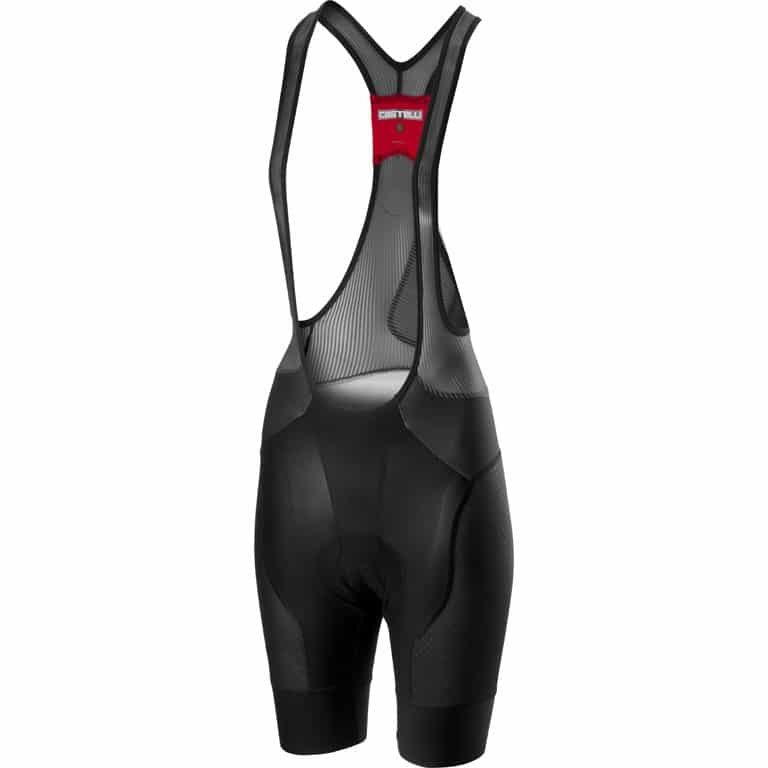
The lower body is generally easier to get right than the upper body. But, beware! It holds special importance given the need to be comfortable in the saddle and ensure enough mobility in the legs to maintain performance. While the legs don't feel as cold as the other body parts, it is critical to protect your knees from the cold to prevent injury. Recommendations for temperatures below which knees should be covered vary from 15-18°C. Perhaps we're just a bit too Canadian, but we find the lower end of the range is suitable and wouldn't dream of wearing knee warmers at 18°C!
Finding a set-up that doesn't sacrifice comfort on the bike or cause saddle sores is critical, too. If you don't plan on riding extensively in cold temperatures, seeking out inexpensive bibtights could be appropriate. But, remember, it comes at a trade-off with chamois quality. If you have issues with saddle sores, or any chronic discomfort, you might want to opt for a higher quality pair of bibtights, or consider tights on top of your favourite summer bibshorts for men and women (but, beware that too much thickness between your shorts and your saddle can create other challenges).
High quality winter cycling pants often provide multiple layers of material to protect the knees and can be a one-stop shop for the layering we have described throughout this post, but - in especially cold temperatures - there is nothing wrong with slipping a pair of knee or legwarmers underneath your favourite tights.
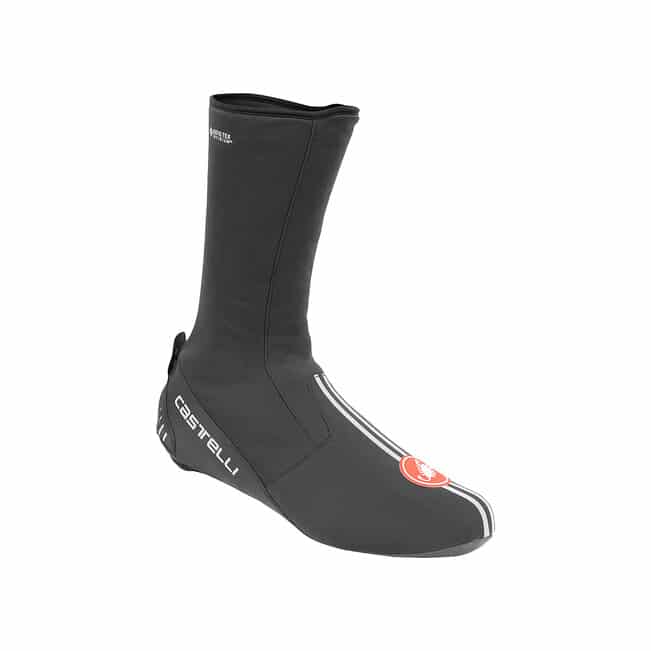
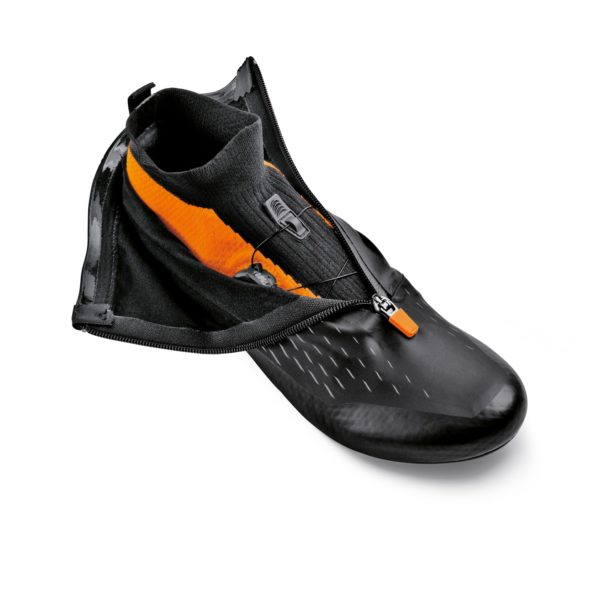
We have all experienced it: The misery of painfully cold fingers and toes. Cycling is especially prone to freezing your digits due to the extreme temperatures created by wind-chill and the blood flowing to the working muscles rather than all the way out to your extremities. Cold fingers and toes are the most cited reason for people not making a concerted effort to ride outdoors through our notorious Canadian winters.
Here's the good news: One of the keys to maintaining warmth in the extremities is to keep your core warm. So, if you follow the advice we shared earlier in this guide, you're already halfway there to keeping your toes toasty. You may notice that your fingers and toes start out cold (regardless of glove choice and shoe choice) for the first 30 minutes until your core warms up - and then you forget all about them. That said, to fully vanquish the cold and enjoy cycling through the winter months, you will need to add a few additional products to your winter cycling kit:

As with any season, wearing sunglasses when on the bike is a must to protect your eyes from flying debris, bugs, and the drying effect of strong winds. The winter season is no different and it's perhaps even more important to protect your eyes as the cold wind can make your eyes water. Canadian winters are often cloudy and overcast, so opting for winter cycling glasses that are lighter in tint can be beneficial. At the opposite end of the spectrum, when there is snow on the ground and the sun makes an appearance, you will need something darker as the glare can be intense. We recommend taking a look at photochromatic lenses if you just want one pair, which can set you up for all occasions and even work if you get caught after dark with the short days. Most brands offer photochromatic options, but we particularly like those from Alba Optics for both your summer and winter cycling gear.
Cycling throughout the year in the Great White North ushers in a few challenges, but with a few critical winter cycling gear essentials, a basic of understanding of layering, and a bit of practice, you can experience all the beauty of the seasons. Yes, some days it will just feel easier to dial up Zwift or TrainerRoad and hit the indoor trainer, but when you're craving fresh air and your gravel bike is calling, indulge yourself!
Full Disclosure: We’re cyclists – not manufacturers. This guide is based on our own experience riding in the fall and winter in Canada – to help you decide what is right for you. Decisions on what to sport - or not - are strictly yours to make based on your own individual needs and preferences. Ride safe!
There truly is no better way to explore a new land than on two wheels. What’s more, a luxury bike tour allows you to connect with your surroundings in a meaningful way and discover a new corner of the world. You can sample the cuisine and take in the sights, sounds and culture of a region, all while sharing in your pedal-powered passion. In this article we shine a light on some of the best luxury tours, companies, and destinations you can find.
Planning a luxury bike tour can be broken up into convenient chunks so that you don’t get overwhelmed by the amount of information you have to remember.
The first thing to do is to choose the location and season you will be riding in. Later in this article we will touch on luxury tours in both North America and Europe to help give you some inspiration for your vacation.
The next thing to choose is your ride partners. Make sure everyone is at a similar level, or if not, that there is a general understanding of the plans. This way no one gets left behind or restless if the pace isn’t high enough. Be prepared to get brutal. If you want a relaxed holiday, maybe don’t invite the semi-pros in your club. On the other hand, if the goal is to train and get fit, leave the laid-back riders at home.
Will you want to ride purely on the road or mix it up with a luxury mountain bike tour or gravel ride? Decide this in the group and start planning routes and researching the area before the travel date. This way you get an understanding of the area, if it is hilly or flat, and the type of riding you will be doing day after day.
Of course, you can plan a luxury bike tour yourself, but it can be a stressful experience trying to juggle friends, accommodation, events, and your own riding. Cut this all out by traveling with a luxury bike tour company. The section below details some of the very best that can help guide you around Europe on two wheels.
Planning what kit and accessories you will be bringing with you is a vital stage of preparation. Create a tick list and compile the best clothing, accessories, equipment, and non-cycling kit you will need for the tour. Not forgetting of course your bike, shoes, and helmet. Something like the men’s and women’s CASTELLI Free Aero.
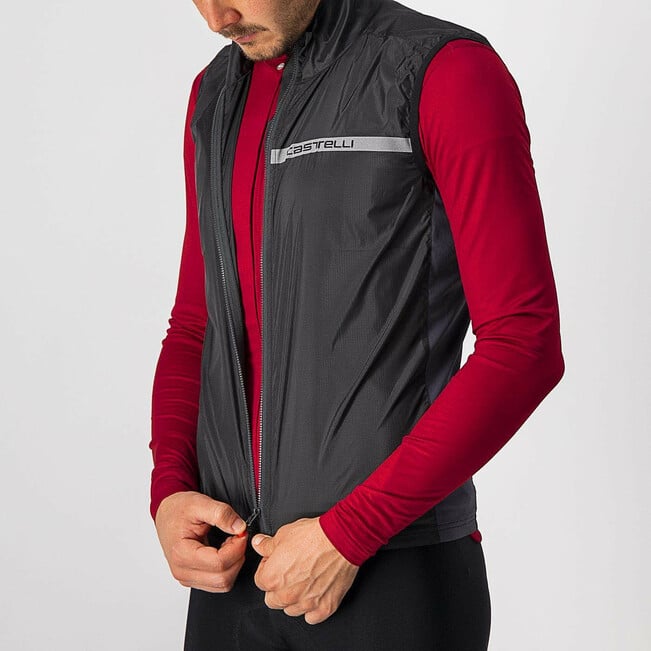
Race 4 bibshorts are ideal for hot conditions and are constructed to keep you cool. On top, the CASTELLI Vantaggio jersey and CASTELLI Primavera jerseys are also brilliant pieces of kit to tour in. If the sun goes behind a cloud at all on your tour, the SPORTFUL Pro Vest is sure to keep your core warm. Lastly, our range of Alba and POC sunglasses as well as our ABUS and POC helmets will neatly finish off your look and keep you safe. For more on what to take on your trip, read our essential kit list.
Getting the miles in before travelling is crucial if you want to have the best experience. Depending on your destination you might be riding all day on rolling terrain, so you will need a base fitness to help get you going. Trust us, having some training miles in the legs will make your luxury bike tour far more enjoyable and comfortable as you will be able to keep up with the pace.
For more on planning a bike tour, check out our earlier articles on the subject. Planning A Cycling Trip? Here Is Our Guide To Help You and What Makes A Great Cycling Trip? both take you from initial internet search to the plane.
As well as our step-by-step preparation for a luxury bike tour, there are some things to consider beyond the obvious when planning a trip. These are tips that no one really tells you but are vital for you to have a successful tour.
It’s easy to forget about your nutrition when riding round a beautiful part of the world sampling rich cuisine. This is all fine but remember to keep eating and drinking on the bike throughout the day so that you do not hit the wall. Down time is also crucial for recovery. It’s well worth planning days off the bike in advance of the trip. These can be used to boost the morale of the group and delve deeper into the region’s culture. Our previous article, Pitfalls When Planning A Cycling Trip, is a cautionary tale of what to avoid on your travels and dives a little deeper into this point.
To really get stuck into the culture of a region it is well worth travelling with a luxury bike tour company so that you can have as much of an authentic experience as possible. One such company is Duvine. They run bike trips all over Europe and combine culture, local character, cuisine and luxury accommodation with quality bikes, gear, ride support and routes to create a truly immersive experience. The guides are expert cyclists and connoisseurs of their region, as well as top mechanics and linguists, so there really is no stress. The accommodation, meals, gear, support, activities, and bikes are all provided so that you can keep the pedals turning and the good times coming.
Italy is arguably the home of European luxury bike tours. Not only is the cycling spectacular, but the cuisine, views and accommodation are world class. From the high peaks of the Dolomites to the glistening coast of Puglia via the cedar-lined gravel roads of Tuscany, Italy is a true feast for the senses. Wherever you choose to travel in Italy you will find great riding and even greater company.
Duvine, and others such as Backroads, Ciclismo, and Trek Travel, offer a number of tours in Italy from the smaller isles of Sicily and Sardinia, to the mainland where you can take in the mountains of the Dolomites, or the picturesque region of Puglia. Italy is renowned for its world-class cycling, and you can experience the best of it by choosing one of these high-class tours for your next trip.
It’s not just the cycling this European country is renowned for – the culture and cuisine are something you need to experience at least once in your lifetime. Devour the traditionally cooked pasta and taste the difference in the local olive oil, while soaking in the atmosphere of a vibrant and colourful country on your bike.
If Italy isn’t top of your bucket list, then fear not, as major tour companies offer luxury tours across Europe. Discover the cols of France, the architecture and history of Portugal or silky smooth roads in Spain, all while not worrying about the logistics of planning your dream trip – it’s all taken care of.
Explore the lesser known regions of France, ones that perhaps aren’t visible from watching the Tour de France. Not every ride need be a life-changing, leg-destroying epic. Instead, why not roll steady through the sunflower laden fields of Provence or the towpaths of the luscious Loire Valley. Complement your stays with the ultimate in fine cuisine by indulging in some of France’s best Champagnes and wines. Each region has a distinct offering that cannot be matched in quality or dedication across the globe.
Portugal might not be the first place you think of for a luxury cycling tour, but it’s having somewhat of a resurgence. No longer just the place where port is bottled, its historical architecture and rolling roads are some of the quietest and well maintained in Europe. Pair the dazzling liquors with smoked meats and hearty stews, or snack on tropical fruits as you ride.
Spain is a further great European offering. Home of the Vuelta a España, it offers much more than meets the eye for a luxurious cycling tour. The drastic differences in landscapes and terrains make Spain an ideal destination for those who want to taste a little bit of everything on their tour. And speaking of taste, you’ll not be able to escape the succulent tapas and strong flavours of the Spanish cuisine – the perfect complement to any long day on the bike.
As well as their deep bench of European tours, Duvine cover the United States, offering several trips that each have their own charm and identity. Whether you’re looking for a mountainous getaway or a vineyard inspired retreat, the US has diversity on its side.
Discover parts of the US that you didn’t realise existed and indulge in cuisine refined and distinct in its preparation. Consider the locally sourced seafood in Washington, where you can enjoy a farm-to-table experience while enjoying the challenging scenery of Mount Constitution. Or one of the many experiences in California – you wouldn’t believe this vast landscape belongs to one state. Stay near the famous wineries and vineyards that are home to some of the world-famous Zinfandels, while enjoying the fruits of the local produce, such as avocados and berries.
If you’re more of a winter lover, why not consider a trip to Colorado in the cooler months, home to the Rocky Mountains? Live like a local in luxury huts and refuges, perfect for a good ski. Or ride through Aspen and Independence Pass to discover why riders flock here for valuable training camps. The United States is home to some of the most varied and beautiful landscapes on the planet, and luxury cycling tours are the best way by far to get to know these areas.
Although luxury bike tours immerse you in the very best of your destination’s cycling and culture, guided riding shouldn’t be a foregone conclusion. Taking on the routes unguided can make for a thoroughly enjoyable - perhaps more adventurous - bike trip. Self-guided doesn’t mean that you will be sleeping under a bivvy and roaming the wilds alone – far from it. Instead, you are following the same routes, staying in the same accommodation, and enjoying the same activities you would otherwise, only not in a group setting.
Whether you prefer guided or unguided luxury tours largely depends on your own preferences. If the idea of a more intimate trip with friends or family takes your fancy, you’re an experienced cyclist or can speak the local language, throwing yourself into a self-guided tour can be an exciting voyage of discovery. If not, it’s a good idea to get yourself onto a worry-free guided tour so that you can have the best time possible.
…
Luxury bike tours are incredible experiences that make the most out of your training and fitness on the bike. Wherever you choose to travel on your next luxury bike tour, whether it’s at home or further afield, you will need a quality kit for the best experience. Head to our store for the best quality apparel and accessories for your trip. And remember the transport of your gear - brands like EVOC exist to help you get there!
In the natural evolution of road cycling there comes the stage when it is time to invest in a power meter. This usually comes after you get the hang of a bike computer and want to push to that next level of performance. Riding on a daily or weekly basis will gradually make you a better rider but there is a point at which you hit a ceiling. This is where targeted training plans with the help of a cycling power meter come in. In this blog, we are going to answer some of the burning questions surrounding this nifty bit of tech.
It seems only right to start by explaining what bike power meters are and how they work. Quite simply, these small devices measure a rider's power output – but there's a lot more to them than just that. They can be installed via the rear wheel hub, as a specific pair of pedals, in the chainring or in the crank arm itself. The device uses a strain gauge to measure the forces being applied through the pedals. They then measure this force and combine it with a few other metrics to calculate your power.
To understand specifically what they measure there is a handy equation. Even if you're a math-phobe it is important to understand it. The equation is power = force x distance/time. It may sound confusing at first but essentially the force is how hard you are pushing on the pedals and the distance/time is how fast you are turning the cranks and for how long. This results in your cycling power number and most meters will come with software that helps you visualize the data in a handy graph or sector-by-sector breakdowns when you connect to a third-party system like Strava or TrainingPeaks.
The data points they provide are:
The purpose of a bike power meter is to give you real-time data so that you can judge how you are riding. This is more accurate than just watching your cadence, heart rate and speed because with these metrics there is a bit of lag involved, especially when climbing. Cycling power meters, on the other hand, give you results instantaneously which means you can accurately see metrics like if you are in the correct zone.
Training in the correct zone is very useful when doing training sessions both on the road and indoors on a platform like Zwift where you might be doing quite short but intense bursts of effort. The bike power meter's purpose in these scenarios is to help you pace yourself more accurately. This in turn, when scaled up to a competition, allows you to work out a strategy based on your ride data and not just blindly trust in your own raw power and will. Intrinsic motivation does go a long way but when combined with reliable tactics and pacing your performance improvement can be substantial.
When used diligently, a bike power meter absolutely can improve you as a cyclist. Due to the fact that you can measure and improve upon your cycling performance, they can help you unlock your inner biking ability. They can make you faster on the bike and improve your stamina more than any other piece of training kit and can be an incredible tool in ride and race planning. This is because you can see how you will perform on a certain length of climb, during repeated sprint intervals or in a race against the clock. It’s like studying for a test. You wouldn’t go into an exam, pitch or meeting without prior understanding, so why go into a bike race the same way?
However, it is not as simple as saying that just using a bike power meter will make you a better cyclist overnight. Although they do have their benefits, you can’t simply just slap a device in your crank and expect to be leading the pack the next week. A lot goes into becoming a better cyclist of which using a power meter is just one pillar. When used in combination with a good riding mentality, a training plan, work ethic, nutrition and bike skills, you will quickly see improvements in your fitness, ability and speed.
If you are serious about riding, racing and improving your level of performance, riding with a bike power meter is a must. Using a power meter will make your training truly count no matter how long or short the session, and will track your improvements in fitness or injury recovery. You can be more efficient on the bike when following a structured plan and collecting and tracking data prevents you from guessing whether you are doing the right thing or not.
The gains witnessed simply by tracking progress can push you as a rider and improve your motivation. Instead of cutting a session short or sitting up too early in an interval, a bike power meter pushes you to dig deep and reach the next zone. Lastly, you improve as a rider when you understand your strengths and weaknesses. The data from a power meter can show you your weaknesses whether it be climbing, sprinting, time trials, or something you've concocted. You can then tweak your training to work on those specific skills.
However, this doesn't mean you should always focus on the power meter and stare robotically at your stem every ride. Although the device is incredibly useful for training, it is important to remember not to get too married to cycling tech accessories so as not to forget the beauty of the sport. It is perfectly fine to take a day off analyzing training plans, graphs and spreadsheets and having a long day in the saddle where you enjoy your surroundings, nature, or someone else’s company.
For riders who are looking to go that extra step and searching for ways to get real-time data about their performance, power meters are absolutely worth it. Unfortunately, one thing that is routinely said about power meters is that they are rather expensive. This is because it is a specialized piece of kit that is often hand-built and comes packed with small and expensive working parts.
Significant development goes into making the strain gauges and most of the inner workings of a power meter are custom made, hence the close to four-figure price. They are worth it though as they are by far the most effective training tool you can buy provided you plan on making use of that data. By understanding what we have detailed above in terms of race planning, training and pacing we can see that the inference and changes that you can make to your riding thanks to accurate data feedback are well worth the initial cost.
The power meters we stock at NOMAD are pedal based devices and we favour the Garmin power meters for the simplicity they offer in getting set up and switching between bikes.
GARMIN Rally RK200 - $1,429.99
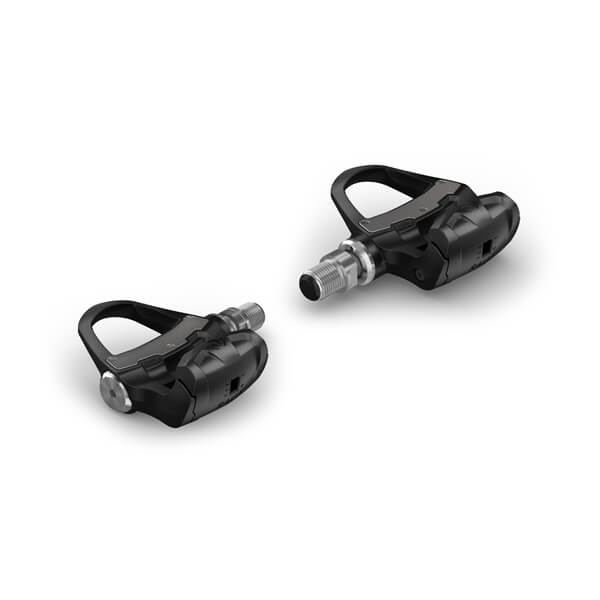
At just 326 grams, these Garmin pedals are super light and have undergone rigorous tests to ensure reliability and accurate readings. They provide advanced metrics so that you can tailor your training around the data points the power meter provides. It shows you where in the pedal stroke you are producing the most power, tracks your effectiveness when riding in and out of the saddle and quickly connects with third-party apps. It is compatible with KEO cleats.
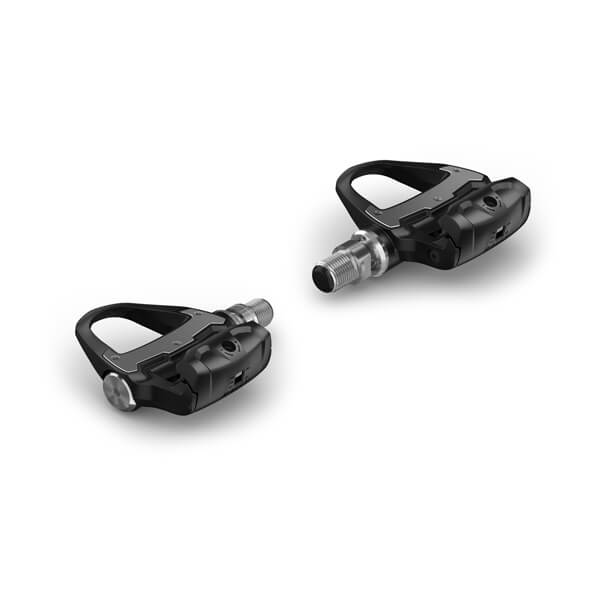
The Garmin power meters all work in much the same way with different cleat compatibility. The 100 series of Garmin Rally pedals offer many of the same data points, but limit measurement to one side to make the cost more manageable.
When used correctly and in addition to a training plan, a bike power meter can transform your riding. When it comes to the question of worth, these are quite expensive pieces of kit, but the long-term rewards will far outweigh the short-term costs if you are prepared to do the leg work. By following the data, understanding their value, and tweaking your regimes you can get quicker on the bike with a cycling power meter.
If you need more convincing before investing, talk to a ride partner or friend who may already use a bike power meter and ask how it has benefited their cycling. No more aimless training sessions, it’s time to knuckle down and ride with purpose and achieve your goals with the help of a bike power meter. Of course, if you have any questions you can reach out to us at hello@nomadfrontiers.ca.
One of the most common questions asked when bike riders start their cycling journey is “do I need a bike computer”? Hesitation when buying is understandable: perhaps not all of us are willing to make such a large investment, and, to some, bike computers can seem to suck the fun out of riding. However, bike computers are not solely for riders who need to track their speed, power, and elevation – they can be equally useful for navigation, encouraging the typical casual cyclist to further explore their locality and try more adventurous routes. Whether or not you need a bike computer will depend predominantly on you and what type of riding you do.
Before deciding if a bike computer is a worthwhile investment, we should discuss what a bike computer is, and what it does. Computers are usually mounted to the cockpit – the combination of handlebars and stem – of the bike, visible to cyclists as they ride. There is a range of bike computers available, all equipped with different technologies for different uses.
The most basic computers typically track speed and distance, with the more advanced models capable of navigation alongside logging several other types of data. Most top-of-the-range bike computers allow riders to log their rides, later uploading them to Strava or other ride-tracking apps. Such computers also enable riders to pair other devices that log power and cadence, to more precisely gauge their efforts. The biggest selling point for many is the navigational capabilities of bike computers: users can plan routes in advance, upload them to their devices and follow directions given by the computer during their rides.
Having discussed the uses and abilities of bike computers, you may be thinking that a phone can do most of this. Well, yes, a smartphone has many features that can replicate a bike computer, and many riders will opt to track their rides using their phones rather than invest in a new piece of equipment. However, as many of us know, the battery life of smartphones leaves something to be desired, especially when using mapping apps. For riders who venture out for longer than two hours, relying on a phone for navigation can be risky – bike computers are designed solely to help your riding and therefore generally have a longer battery life, even when using the mapping features.
For more avid cyclists wanting to log their data when riding, bike computers have more advanced features, allowing you to see your power, heart rate, and cadence during your ride. Similarly, the GPS system in top-of-the-range bike computers is superior to that in most smartphones and the maps of bike computers are better suited to guide your riding, particularly for those who explore off-road trails. The design and manufacture of bike computers – specifically more expensive ones – are such that they are considerably more durable than smartphones, designed to withstand extreme conditions, and battering and bruising by the elements.
As with any piece of cycling equipment, there are advantages and disadvantages to buying a bike computer rather than using a smartphone:
Advantages:
Disadvantages:
The ultimate question is one of personal preference. Depending on what kind of riding you do, you may choose to invest in a bike computer, and all the kit to go with it, or you may choose to stick with your tried and tested techniques for mapping your rides. Let’s look at what to consider when deciding whether or not to buy a bike computer.
Where you ride:
As we’ve mentioned, where you choose to ride can impact your decision to buy a bike computer. For off-road riders, the improved precision and accuracy of GPS in the fanciest computers allows for more reliable navigation, as more trails and off-road sections are recognized in their mapping system. If you usually ride on the road and are planning on venturing further afield, the navigation system of bike computers can help you to find your way around the less familiar routes in your local area. Any cyclists riding in new countries or on unfamiliar roads will also benefit from a computer equipped with maps, particularly when mobile data (which can also be costly, particularly when roaming) is not readily available.
How long you ride:
The long battery life is an important selling point for bike computers – many can last up to 12 hours while using maps, a vast improvement on a typical smartphone in constant use. Riders spending long hours out on the bike will likely be more concerned with pacing themselves: the information provided about distance, speed, and power can help with measuring efforts for your long days on the bike.
If you happen to be traveling long distances and away from power outlets for extended period of times, as in bike packing, having a bike computer has obvious navigation benefits, but also allows you to keep your phone charged for emergencies.
Why you ride:
Although any rider can benefit from bike computers, the reasons for buying one will depend on what kind of riding you are doing, and what kind of rider you are. For avid cyclists training and racing to improve their physical performance, bike computers are unquestionably a good investment. The available data when riding with a bike computer – including average speed, current speed, riding time, distance, elevation, heart rate, cadence, and power – can be crucial to maximize your physical gains and better your cycling potential. Almost any serious training plan will involve some data collection and analysis, but fair warning: it can become addictive!
For those riders who are getting involved in cycling for the first time, an entry level bike computer can be a good idea for tracking your trajectory, but certainly is not necessary to become a more serious and accomplished cyclist. Riders who use their bikes as a method of exploration should consider buying a bike computer with GPS capabilities to avoid the risk of getting lost and stuck in unknown territory.
Until recently, Garmin had a near monopoly on the bike computer market, and then Wahoo came along. Wahoo somewhat surprised the industry, forcing Garmin to improve its standards, with a longer battery life and clearer map display, as well as the reintroduction of buttons rather than a touchscreen to operate. Currently, the two brands are the most ubiquitous, but newcomers such as Karoo are looking to challenge the status quo. Once again, the choice between Garmin and Wahoo is mainly one of personal preference – both companies offer several devices at different prices to suit your needs. Let’s have a look at what a few of the computers have to offer.
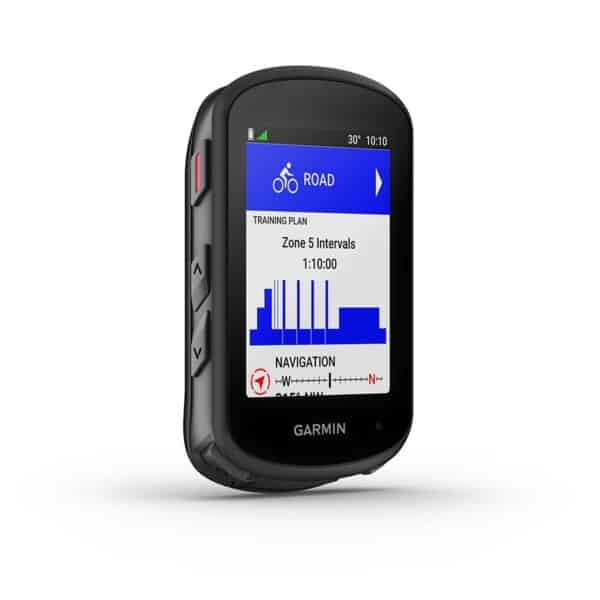
Not quite the cream of the crop of cycling computers, but nonetheless the choice of many keen cyclists and racers for overall functionality and performance. A mid-range computer that will set you back a reasonable amount, but with a high-standard battery life, display, and durability. If you are serious about tracking your numbers or exploring the world on your bike, this will have you covered. The newest editions see a return to buttons from the previously used touchscreen (still available with the Garmin 840), which some find easier to fiddle with while on the move. The introduction of a colour display makes for clearer maps, however, slightly reduces battery life, albeit still providing 20 hours per charge.
The Edge 540, weighing just 76g, comes equipped with the now standard performance metrics, such as recovery time and heart rate zones. As ever, it can be connected to your other devices via Bluetooth or a USB cable. With the same capabilities as most of its Garmin siblings, and a comfortable size – not as large as the 1040, but with enough screen space to fit all your data – this is our favoured device for all-round training and navigating. Its closest competitor is the Wahoo Elemnt Bolt, with similar capabilities and a nifty phone app for programming.
Wahoo Elemnt Roam
The top-of-the-range bike computer from Wahoo is suited to anyone riding or racing seriously, with some cash to spare. This computer features anything you could want from a bike computer. Featuring a crisp, full-colour display, you can download maps and upload data using either WiFi, Bluetooth, or ANT+. Unlike many devices, you can reroute during your ride, and it comes with pre-installed maps of the majority of countries. Naturally, this computer has all the performance improving technology of other devices, even including preloaded workouts, and is fully button operated. The Wahoo computers feature an integrated mount, which may be preferable for stability and weight-saving reasons but removes the option to customize your cockpit with a funky mount.
If you’re after the best of the best, it comes down to the Elemnt Roam and the Garmin 1040, which offer similar features and functionality. We love the 8.9-centimeter viewing area on the Garmin 1040 for navigation, particularly when off the beaten path, but it isn’t for everyone. If you want the functionality, but prefer to keep the package size smaller – go for the Elemnt Roam.
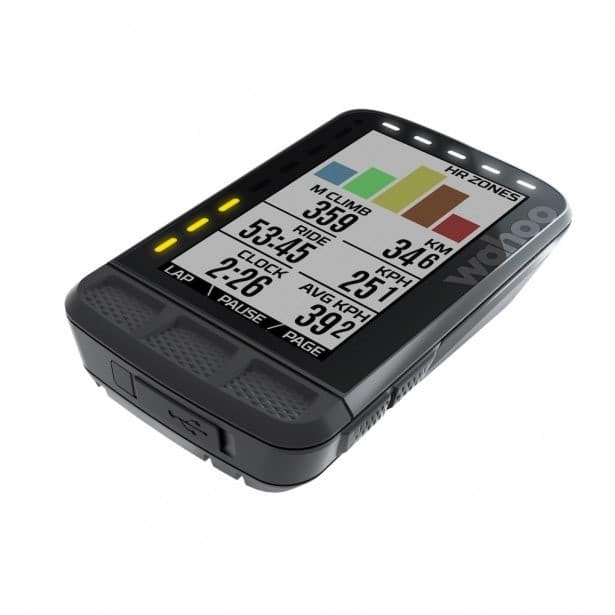
Bike Computer Wahoo Elemnt Roam
Bryton Rider 15E Neo
If you are thinking of getting a bike computer but are uninterested or can't justify the excess precision of more expensive variations, the Bryton Rider 15E Neo may be ideal for you. Without sacrificing the basic properties of a good bike computer, this device is designed for beginners, more casual riders, and anyone not wanting to fork out $500. All the necessities are here: GPS maps, 16 hours of battery life, clear data display, and ride logging so you can upload your rides on Strava. For less than half the price of many other computers, the Bryton model also allows you to pair a heart rate monitor, and speed and cadence sensors for accurate data tracking.
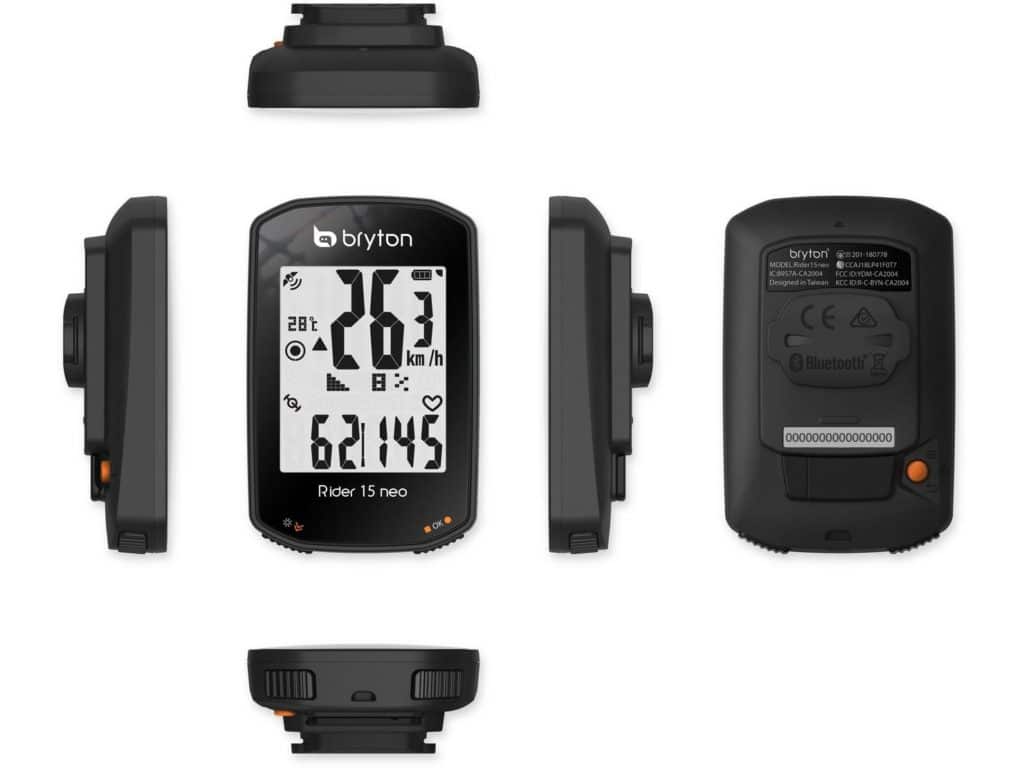
Bike Computer Bryton Rider 15E Neo
You may also consider entry-level options from a brand such as Cateye Bike Computers, which has been in the cycling computer business for decades and churns out a consistently good product.
If nothing takes your fancy and you decide that bike computers are not for you, there are some methods to use your smartphone in place of a computer. Phone mounts for your handlebars are readily available now, and using route planning and tracking apps such as Komoot and Strava, you will be able to replicate the experience of a bike computer.
The biggest remaining issue with using your phone as a cycling computer is battery life, which can be solved – although somewhat inefficiently – with a portable charger. Any riders who plan to ride for longer than the battery life of their phone and portable charger combined should seriously consider investing in a bike computer. The last thing you want is to run out of charge in the middle of unfamiliar countryside. Besides, who doesn’t like new gear! Whenever you deem it the right time to make the leap, we trust you won’t regret it.
Alongside the saddle and the handlebars, the pedals are one of the three points of contact of a rider and their bicycle. They also serve as the sole location for power transfer from a cyclist’s legs, so are one of the most important components to consider when setting up your bike.
Like many other bike parts, it can be difficult to discern what you should be looking for when choosing your pedals, what difference they can make, and which types of pedals are best suited for your needs. Pedal selection is one of the more personal component choices for your bicycle, and you will need to find the correct balance between comfort, versatility, and price; in addition to evaluating the potential performance benefits from different pedals.
For the uninitiated, the categorization of pedals can be perplexing: clipless pedals are those that you clip into, platform pedals are also known as flat pedals, and different brands use a range of mechanisms within their pedals. Here is a quick summary:
Within these two broad categories, there are several features that vary with each style of pedal that are designed to optimize them for use in a particular environment:
When deciding which pedals to opt for, it is necessary to understand what each type of pedal is used for and the design features that enable the pedals to suit their requirements.
As noted, platform pedals are the most common beginner pedal and will be suited to anyone who is new to riding or is a casual cyclist. They are also extremely useful in mountain bike riding and are the choice of most downhill and enduro cyclists. Their utility does not stop there, though, and it is not obligatory to ditch the platform pedals in order to feel like a proper cyclist. Platform pedals can also be ideal for those wanting to explore on their bikes. As bike-packing and cycling touring becomes increasingly popular, it makes sense to select a pedal that does not require specialized shoes, especially as cycling shoes can be quite difficult to walk around in.
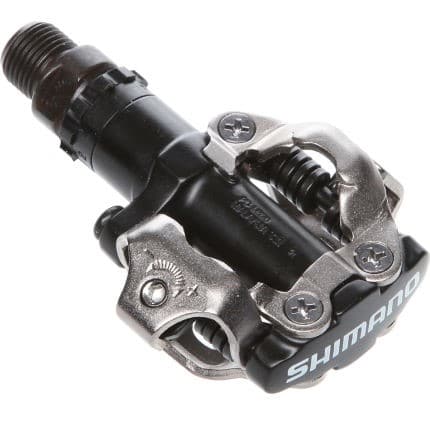
SPD pedals are the most practical of the clipless pedals and are the most widely used. Appropriate for many disciplines, SPD pedals are perfectly suited for mountain biking and cyclocross. The metal pedals are more robust and durable than pedals made from other materials so are fit for riding among rocks, mud, and dirt. The material and shape of the cleats used with SPD pedals also permit more walking than other cleats, and therefore SPDs are frequently used for gravel riding and cycle touring.
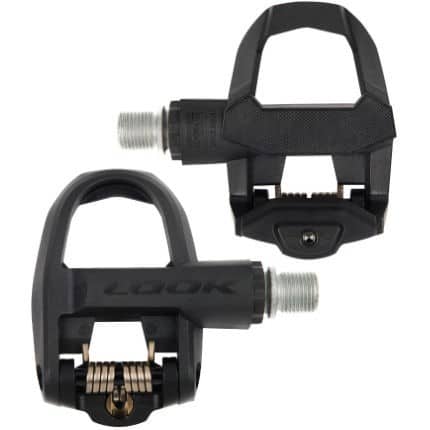
These pedals are those which are commonly favoured by road and track cyclists, especially racing cyclists. Both types are based on similar mechanical designs and have almost identical shapes, optimized for power output, with a consideration of aerodynamics and weight. SPD-SL and Look are rarely used for mountain biking, cyclocross, or gravel riding but can be used for cycle touring.
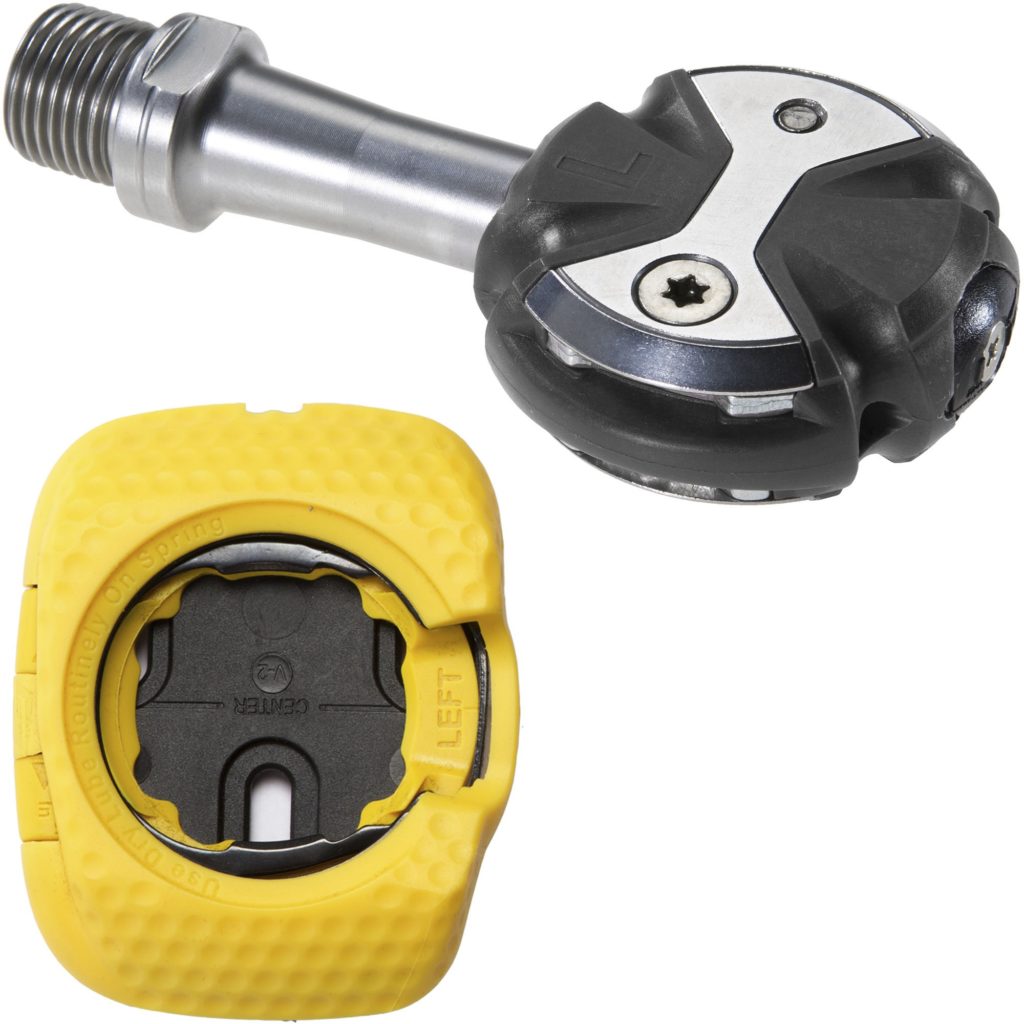
There is a wide range of less ubiquitous pedals, including some mentioned here, and variations to adapt pedals for a different use. Notably, Speedplay pedals, used for all-terrain, are a top of the range brand that are the midpoint between SPD and road pedals, combining the light weight of road pedals and the shape of SPD pedals. Platform pedals can be made to approximate clipless pedals with the addition of toe straps – somewhat out of fashion in modern days but still favoured by track sprinters who are concerned about unclipping their feet due to extremely high output of power. Perhaps the most convenient variation is the combination SPD pedal, which features an SPD pedal on one side and a platform pedal on the other, allowing the rider to utilize the best features of both types of pedal. An additional variety, increasingly popular with avid cyclists and racers, is the power pedal, a pedal that comes equipped with a power meter for you to improve yourself and track your riding more precisely.
As expected, each pedal will have advantages and disadvantages, depending on its design and versatility. Here, we shall examine the pros and cons of the pedals we have discussed.
| Pros | Cons | |
| Platform | Cheap
Versatile, all-terrain appropriate Robust Use with any shoe Easy to remove foot from |
Lower power output – no pulling up
Lower stability Easier to slip foot off |
| SPD | Cheap
Versatile, all-terrain appropriate Durable, tough Dual-sided – fast clipping in |
Heavy
Smaller area – lower power output |
| SPD-SL, Look | Affordable
Lightweight Wide range of positions Stable once clipped in Variable float |
Only used for road and track
Cleats need replacing more often One-sided Hard to walk with compatible shoes |
| Speedplay | Lightweight
Variable float Easier to walk in Dual-sided |
Expensive
Smaller area – lower power output |
| Power pedal | Built-in power meter
Lightweight Stable once clipped in Variable float |
Expensive
Only used for road and track One-sided Hard to walk with compatible shoes |
So, how do you choose which pedals to go for? The biggest factor to consider when picking pedals is what you will be using them for. Platform pedals, while very versatile, are not the most practical for progressing in your road cycling. Most bike riders who choose to make the switch to clipless pedals will do so for increased control, comfort, or better power output. Since clipless pedals allow the rider to pull up on the pedals, in addition to pressing down, anyone who is considering competing in road racing will need to use clipless SPD-SL, Speedplay, Look, or another type of road pedal.
However, not everyone is trying to go as fast as they can. So, let’s look at what road riding you are doing and we can decide what will best suit you.
Whether you are just getting into road cycling, or you have been riding casually for a while, you probably won’t be looking to minimize weight at the cost of a carbon road pedal. To avoid having to frequently adjust and replace your cleats, it is preferable to opt for metal cleats – which are also easier for first time use as you will have no trouble clipping in and unclipping. Equally, if you aren’t interested in investing in a pair of cycling shoes, pedals, and cleats, platform pedals with regular tennis shoes will do just fine – and they are less likely to cause any knee pain from badly angled cleats.
Our choice: platform or SPD
If you are starting to ramp up your riding load, you will probably benefit from having the increased stability and comfort that can be achieved with making the switch to clipless pedals, but which ones to choose? SPD pedals are a good long-term investment, you will rarely have to buy new cleats, and your pedals are unlikely to suffer from wear and tear. Equally, you may well be interested in purchasing some sleeker, lighter pedals, more appropriate for road riding. The biggest decider should be how long you intend to spend wearing your cycling shoes off the bike: if you like to ride to a café and meet your buddies, SPDs will be ideal. If you spend just a little time walking in your cycling shoes, go for the SPD-SLs or Look.
Choice: SPD, SPD-SL, or Look
If you’re planning to start racing and training, pedals designed specifically for the road are a must. The weight difference is a key factor to consider when you’re trying to go as fast as you can, and the SPD-SL and Look pedals are cheap enough to justify the investment. For multidiscipline racers, you might contemplate buying Speedplay pedals, which are renowned for being lightweight and used across terrains, although they are significantly pricier than other pedals. If you are also searching for a power meter to improve your training, go for a set of power pedals.
Choice: SPD-SL, Look, or Speedplay
For riders spending hours traversing the country on their bikes – a set of SPD or SPD-SL pedals would seem like the ideal fit. If you stop often on your distance cycles and like to explore on foot, look no further than SPDs, hard-wearing and reliable, they can endure long days of riding. For those of you who like to do your rides with minimal stops, SPD-SL is a better option and much lighter to carry you over the hills.
Choice: SPD or SPD-SL
The adventurers among you will be looking more for comfort and durability than anything else. If you use your bike as a form of transportation, carrying you to a new location to explore, standard platform pedals may be the ideal option. There’s no need to lug around another pair of shoes or worry about your cleats eroding – just ride in any shoes. However, if your riding will take you over a more challenging parcours, you may well need all the extra power you can get: SPDs will give you that while not compromising on comfort and resilience.
Choice: platform or SPD
The 2021 Tour de France arrived in Paris on Sunday July 18th, with last year’s winner 22-year-old Tadej Pogačar once again winning the maillot jaune. The young Slovenian dominated the general classification battle, successfully navigating a brutal and attritional first week where many of his closest rivals succumbed to injuries sustained in the crashes of the opening stages.
Having gained valuable time on his competitors on the way to winning the stage five time trial, Pogačar cemented his lead with a devastating attack on the Col de Romme, putting minutes into fellow GC contenders in the miserable and wet conditions of stage eight to Le Grand-Bornand. The back-to-back Tour de France champion picked up an additional two stage victories the following week and extended his winning margin to 5 minutes 20 seconds over second place Jonas Vingegaard, a 24-year-old Dane who was riding just his second ever Grand Tour.
Former Giro d’Italia winner Richard Carapaz became the first Ecuadorian to podium at the world’s biggest bike race when he finished third overall. Such was the 22-year-old Slovenian’s dominance that the Team Ineos ended up seven minutes back on him by Paris. The green points jersey was won emphatically won by a resurgent Mark Cavendish as he picked up four stages to equal Eddy Merckx’s elusive record of 34 stage victories at the Tour de France.
The young rider’s white jersey and the King of the Mountains polka dot jersey were also won by Tadej Pogačar, with the latter spending a day on the shoulders of Canadian Michael Woods.
A day in the KOM jersey wasn’t Canada’s only notable showing at the Tour. Woods’ teammate, Montreal-born Guillaume Boivin, played an integral part in the Israel Start-Up Nation lead-out train, helping sprinter André Greipel to a handful of top ten finishes. Astana PremierTech and Quebec’s Hugo Houle spent the three weeks shepherding his team leader Alexey Lutsenko to an admirable seventh in the overall classification.
Formerly an accomplished middle-distance runner, 34-year-old Woods impressed on several stages, taking third in the first mountain stage after leading on the road and subsequently being caught and distanced by the eventual winner at the top of the final climb. Michael Woods, or ‘Rusty’ as he is affectionately known, was dogged by bad luck during stage 14 but still managed to bag fifth place on the day. Having crashed on a slippery descent while in the breakaway, he missed the winning move when Dutchman Bauke Mollema attacked as Woods chased back on to the break. Nonetheless, Woods’ aggressive racing and climbing ability over the 183km bumpy route saw him take the lead in the King of the Mountains competition, for which he wore the iconic polka dot jersey for the following stage.
The Ontario-born rider left the race after stage 18 to focus on his major goal for the season – the Olympic Games road race, while both his compatriots Houle and Boivin made it to the Champs-Élysées for the iconic finale.
That's it for our Tour de France review, but you can read more about the Canadian contingent at this year's Tour in our pre-Tour spotlight.
The Tour de France started a week earlier than usual this year to allow riders to travel to the rescheduled Tokyo 2020 Olympics. After seeing the course for the Tokyo 2020 Olympic Men’s Road Race, Michael Woods has big ambitions for a fine result. Finishing in the top ten five years in a row at the monument classic Liège-Bastogne-Liège, including a second place in the 2018 edition and most recently, a fifth place, Woods is well-accustomed to epic, hilly one-day races. In 2021, he animated the 259km race, attacking multiple times on the short, punchy climbs throughout the final 30km. With his podium place in the 2018 World Road Race Championships that featured 4,600 metres of climbing, ‘Rusty’ has shown his prowess in mountainous championship races. The parcours of the Olympic Road Race – which includes Mount Fuji – should suit him perfectly and in fact on inspection the profile does lightly mirror the stage of this year’s Tour de France in which he came fifth. Fellow countrymen Hugo Houle and Guillaume Boivin, fresh from La Grande Boucle, will ride in support of Woods’ medal hopes.
In the women’s road race, a three-strong Canadian contingent will tackle a 137km route that – controversially – skips Mount Fuji altogether. Although deprived of a truly spectacular ascent, the course still contains over 2,600 metres of elevation. SD Worx’s Karol-Ann Canuel, Liv Racing’s Alison Jackson, and DSM’s Leah Kirchmann look to make their mark on the race as they represent the Maple Leaf. Canuel’s sixth place in the similarly undulating 2018 World Road Race Championships should stand her in good stead for the hilly sections of the race, while Jackson and Kirchmann, both fast finishers, will be hoping for a sprint from a reduced group.
If there is one downside to the Olympics this time out, it is the unfavourable hours that events will be taking place.
The men’s Olympic road race is on Saturday July 24th at 10pm Eastern. The women’s race is on Sunday July 25th, starting at midnight. Better brew some coffee folks!
It's been super hot in Canada this summer so if you're out on your bike, it's crucial to have the correct kit. Here are ten must-haves from our emporium that are perfect for your summer cycling kit, and there's no better time to visit our online shop with our Tour de France sale running until July 4th.
Castelli created this high-quality men's jersey with the hottest days of summer cycling in mind. This jersey is all about airflow. Its unique shoulder construction and the 3D-printed fabric used on its back work to prevent overheating. It's quick to dry, which is crucial in these conditions so you don't get weighed down by your sweat, and it also blocks more than 90% of UV rays from reaching your skin. Developed for Team Ineos, if it's good enough for the WorldTour, it's probably good enough for you.
The design of this women's jersey certainly stands out and will look great on the roads. If you're out at the crack of dawn to avoid the sun, the Primavera is ideal. The jersey remains lightweight throughout your ride thanks to the ProSecco Micromesh used in the main body's construction, and it features mesh side panels for extra breathability. The Micromesh works to keep you dry by wicking sweat and prevents the sluggish feeling of being wrapped in layers of sticky weather.
If you're looking for a slightly more cost effective summer cycling jersey, the POC Essential Road Logo Jersey is ideal. Thanks to our sale, it comes in at just under $100, but is still a super breathable and high-wicking jersey thanks to the polyester fabric. This construction means that there is ample flexibility for ventilation and temperature regulation. There is an additional zip pocket for your cell phone when you need that extra confidence in a jersey's security. It comes in solid uranium black or a more summer friendly sulfur yellow.
This more lightweight women's jersey screams casual summer rides. The value for money is great, too, and its quick-wicking fabric construction will help keep you dry. It can be used off the bike, too, for running or even at the gym as the concealed elasticated waist with silicone grip prevents it from riding up. Made for those days when you just can't be dealing with sleeves. But remember to lather on the sunscreen!
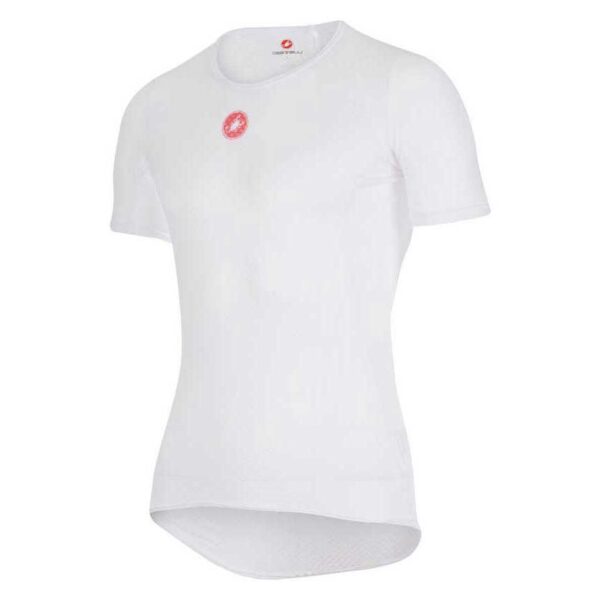
A base layer in summer may seem a bit counter-intuitive, but their construction makes them super useful in high heat. Take this men's Sportful Thermodynamic Lite T-Shirt for example. Made from a lightweight and breathable fabric, this layer has excellent temperature regulation to deal with sweat and ensure you're not left feeling clammy on the bike.
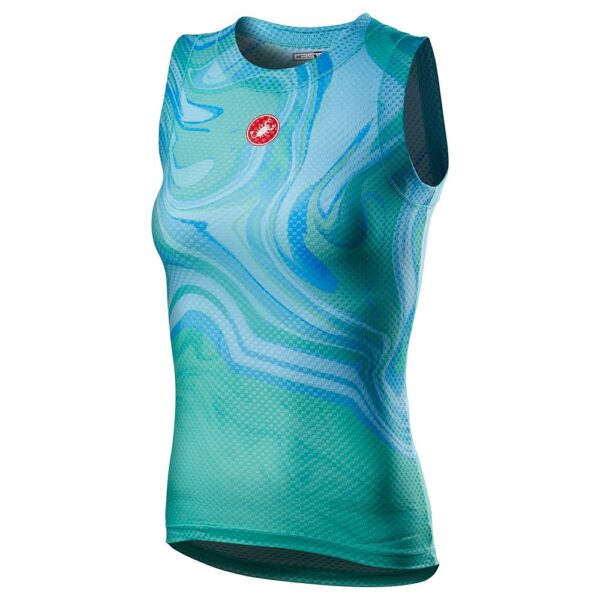
This super lightweight women's base layer works on similar principles. Even at the height of summer cycling, on long descents, pushing through the air will give you a chill on your chest. Wearing something like this underneath your jersey may prevent any potential summer lurgy. A 3D mesh fabric is used here and ensures high levels of moisture management, keeping sweat from making your jersey feel damp. Not only that, but the layer is extremely comfortable and just look at that design!
If you're heading out on long early morning rides, you will also need to keep your personal comfort in mind. The right size ought to fit like a glove thanks to silicone cuffs that keep you gripped but not too tightly. The minimal Total Comfort pad has a variable thickness and works with the pad's size and the shorts' seamless construction to prevent the chafing that can occur over long distances. For breathability, there are little holes, or perforations, in the bib straps to prevent them from feeling tight against the skin. That way you don't get that nasty mid-summer strap sweat and possible heat rash. Made with ultra-riders in mind, it will be difficult to find comfier shorts.
These women's-specific shorts were designed to be raced in, but their super lightweight construction makes them perfect for summer riding. The mesh bib strap works to wick sweat and prevent the shorts from feeling sticky against your skin. Although they look minimalistic, they pack a whole lot of comfort and aerodynamic boosting technologies in them, including a women's-specific chamois and vortex dimpled fabric. At just 156g, these shorts are perfect for hot days.
When the sun's out and the heat is on, a cap can make a big difference. For one, it helps to keep the light from your eyes but, more specifically, this ‘casquette’ from Castelli is made from a highly ventilated mesh. This works to wick moisture from your head - one of the areas you sweat the most - and allows a free flow of air to prevent overheating. There's no wonder that they call this the A/C cap.
We have a whole fleet of sunglasses from Alba Optics and POC in our emporium, so it's worth checking them all out, but we're going to focus on this pair for now. With a comfortable Tr90 frame and adjustable temple fit, you will barely realize you're wearing them. The crucial thing for summer though is the Solo’s VZUM lenses. Made from scratch resistant material, the lenses have integrated UV and blue light absorption and colour-equalizing tint. They are handmade in Italy and are certainly some of the most quality shades we've ever seen.
If you are cycling in this heat, there are a few things to remember. Focus on riding in the early hours of the day to avoid the midday sun, cover yourself in sunscreen, ride with a friend for assistance, and constantly hydrate. Take as many bottles as possible and drink up to two bottles or more every hour.


